i wrote this tut on 31st of august for julies tutorials
Any resemblence to any other tutorials
is purely coincidental.
supplies needed
A knowledege of paintshop pro is needed
paintshop pro i used version 12
scrapkit by bitsnbobs buy kit from here
tube you need a licence to use tube is by Suzanne Woolcott here
font of your choice
lets begin
1)open new image 700x700 transparent
2)c/p frame 4 as a new layer
3)using magic wand click inside frame and go to selections>modify>expand by 10
and using your selection tool make a selection abit smaller than frame
4)add a new layer and choose a paper i used paper 9 then paste into selection
and drag below frame layer.
5)c/p sparkles 2 and duplicate and place one top of paper
and the other bottom of paper layer
6)c/p bubbles 4 and duplicate >mirror and flip place where mine are
7)c/p bow 3 and resize to 300 pixels and place over bow on frame
8)c/p designer mix4 resize to 400 pixels and place over large bubble on the left side
9)c/p flower 2 and place in the middle of the frame
10)c/p flower 4 as a new layer and resize to 400 pixels,duplicate 3 times
see my tag for placement
11)c/p tube as a new layer
12)c/p rainbow 1 as a new layer and place above the frame
13)add a new raster layer and floodfill with white
14)choose 2 colours from your tag and write your text
15)go to image>resize to 400 pixels
16)merge all layers visible
17)add any copyright and watermarks
18)go to file>export as a jpeg save tag and your done
hope you enjoyed my tut,thanks for trying :)
Monday 31 August 2009
jasper&alice
i wrote this tut on 31st of august for julies tutorials
Any resemblence to any other tutorials
is purely coincidental.
supplies needed
A knowledege of paintshop pro
paintshop pro i used version 12
scrapkit is called jasper by cora creations buy kit here
tube of your choice i used keith garvey you need a licence to use here
mask of choice or one i used WSL 81 here
font of choice i used windsong
lets begin
1)open a new image 700x700 white background,
2)c/p frame 4 as a new layer
3)c/p water bottle resize to 400 pixels
4)c/p winged heart as a new layer
5)click inside frame and selections>modify by 3,add a new layer and
paste pp10 into selection
6)choose two colours from your tag and write out your text
7)c/p tube of your choice
8)c/p pp5 as a new layer using your pick tool stretch out a touch
9)go to layers>load/save mask and load mask from disk
find your mask i used WSL 81 And apply,delete your mask layer>right click and
merge group
10)go to image>resize to 450 pixels
11)merge all layers visible
12)add any copyright and watermarks
13)go to file>export as a jpeg save tag and your done
hope you enjoyed my tut,thanks for trying :)
Wednesday 26 August 2009
summer isle breeze
i wrote this tut on 26th of august for julies tutorials
Any resemblence to any other tutorials
is purely coincidental.
supplies needed
A knowledege of paintshop pro
paintshop pro i used version 12
scrapkit is called The Saga : Isle Esme by cora creations get kit here
tube must have a licence to use jose a cano here
font of your choice i used caramel candy
open all supplies in paintshop
lets begin
1)open a new image 700x700 white background
2)c/p the tulle heart and resize by 500 pixels and resize more if you wish to
using your magic wand click inside the heart and add a new raster layer,go to selections>modify
expand by 6 ,c/p pp1 and paste into selection and drag the image layer below the heart
3)i next closed the white background and merged the image and heart together and resized to 500 pixels
4)c/p star fish as a new layer and resize see my tag for placement
5)c/p cloud 2 as a new layer and resize see my tag for placement
6)c/p sun as a new layer and resize to 400 pixels do this for a total of 2 times
7)c/p dragonfly as a new layer and resize to 400 pixels and then to 300 pixels
duplicate dragonfly and mirror it
8)c/p shell 1 and resize to 300 pixels repeat for shell 2 and shell 3 resize again 300 pixels
9)c/p flower 11 as a new layer and resize to 300 pixels
10)c/p umbrella and resize to 200 pixels see my tag for placement
11)c/p sparkle as a new layer and resize to 600 pixels
12)delete the white background and c/p pp4 as a new layer and search out a touch using
the pick tool
13)crop around so you get rid of the transparent part and select
14)pick 2 different colours from your tag and write out all your text
15)add your tube as a new layer,any copyrights and watermarks
16)right click the layer palette and merge all layers visible go to file>export as a jpeg
and save then your done
thanks for trying out my tut,i hope you enjoyed it :)
team jacob
i wrote this tut on 26th of august for julies tutorials
Any resemblence to any other tutorials
is purely coincidental.
supplies needed
A knowledege of paintshop pro
paintshop pro i used version 12
a image of your choice or mine
scrapkit is called the saga wolf park by here purchase kit here
image i got off the net and is attached (right click image and save to your computer)
font of your choice i used wolfs rain
open all your supplies in paintshop
lets begin
1)open a new image 600x600 white background
2)c/p frame 4 as a new layer and resize to 400 pixels
3)using your magic wand click inside the frame then go to selections>modify>expand by 4
add a new raster layer and drag under frame c/p into selection image of your choice select none
4)c/p ribbon 1 as a new layer and resize to 400 pixels
5)c/p the paw prints and resize if required and see my tag for placement
6)c/p moon as a new layer and resize to 150 pixels and place on the left corner of your frame
drag under the image layer
7)c/p the indian suncharm resize to 150 pixels and place on the right corner of your frame
8)c/p the mesh and resize so you can just see it and drag under the image layer
9)c/p butterfly as a new layer and resize to 135 pixels i used the pick tool to rotate slightly
and duplicate the butterfly and mirror it
10)next i choose 2 different colours for the text add your name and any other wording
i added team jacob
add any copyright and watermarks,resize your tag and merge all layers visible and export
as a jpeg and save then your all done
thanks for trying my tut,i hope you enjoyed it,thanks :)
pop rocks
i wrote this tut on 26th of august for julies tutorials
Any resemblence to any other tutorials
is purely coincidental.
supplies needed
A knowledege of paintshop pro
paintshop pro i used version 12
scrapkit is called pop rocks by cora creations HERE
tube of your choice i used is ismael Rac you need a licence to use HERE
font of your choice i used the nautigal
open up all your supplies in paintshop
lets begin
1)open a new image 600 x 600 white background
2)copy and paste the disco ball and resize to 265 pixels and place at the top of your image for now
3)copy and paste the drumkit as a new layer and resize to 300 pixels
i stretched mine out abit with the pick tool
4)copy and paste the alpha doodle move near the disco ball
5)copy and paste the guitar as a new layer and resize to 500 pixels
then resize again to 400 pixels
6)copy and paste the Lp as a new layer resize to your liking and place to the right of the drumkit
7)copy and paste a tube of your choice if using the same tube as me resize to 448 pixels
then copy and paste the glitter notes and resize to 565 pixels
8)go to your preset shape setting and choose the elipse and draw out a circle
thats around the same size as the glitter notes and convert to a raster layer
click inside the elipse you just created with the magic wand and you should see matching ants
add a new raster layer and choose pp 03 and paste into selection>select none move paper
layer underneath the glitter notes
9)close your white background and merge layers visible and resize merged layer to 500 pixels
then open background again
10)choose 2 colors from your tag and write out your name and place where you wish
add copyrights and watermarks,resize tag if you wish and export as a jpeg and save
thats it your all done,thank you for trying out my tut hope you enjoyed it,thank you :)
Tuesday 25 August 2009
Dreams In Fantasia
scrapkit fantasia by bitsnbobs HERE
tube used by AnaRasha at HERE
font of your choice i used scarlett ribbons
i wrote this tutorial on the 25th of august,2009 for juliestutorials.
Any resemblence to any other tutorials
is purely coincidental.
A knowledege of paintshop pro is needed
paintshop pro i used version 12
open all your supplies in paintshop
lets begin
1)open a new image 800 x 800 white background we can resize later if needed
2)open frame 3 and copy and paste as a new layer
3)copy and paste paper 1 as a new layer drag paper layer under frame layer
4)copy and paste dove 4 and place onto frame duplicate dove and mirror it
5)now copy and paste the feather 2 and place where mine to right side of your frame
then copy and paste your feather 3 and place to the left of your frame at the bottom
6)copy and paste bubbles 1 and place under doves place between the doves
7)now copy and paste bling 2 and resize until you get the size required and place under the blur feather
now repeat step 7 with bling 1 but place under pink feather
8)copy and paste bow 1 and place on the top of the frame under the doves
9)copy and paste light ray 2 and place in the left corner of your image
do the same to light ray 3 place into the left corner
10)next copy and paste your light ray 4 but this time place into the right corner
11)copy and paste diamond rain 2 and resize to your liking and place onto your image
12)copy and paste sparkles 3 and resize duplicate and mirror and place where you like
repeat step 12 with sparkles 2 and see my tag for placement
13)copy and paste the angel as a new layer and place between the doves
14)copy and paste the flower gem 2 and place to the left at the bottom of the tag
copy and paste the flower gem 3 and place to the right at the bottom of the tag
lastly copy the flower gem 1 and place see my tag for reference
15)add your name choose to colours from your tag i choose pink for outline and blue
as a fill,write out your name and place where you wish and add a drop shadow
16)copy and paste the tube of your choice i placed mine just on top of my name
add all copyright and watermarks,merge all layers visible go to image>resize to 400 pixels
17)go to file and export as a jpeg and thats it your done
i hope you enjoyed my tutorials ,thanks for trying :)
Friday 21 August 2009
thumbelina
thumbelina
i wrote this tutorial on 21st of august,2009 for julies tutorials
A knowledege of paintshop pro is needed
supplies needed
paintshop pro i used version 12
no tube all elements are in the kit
beautiful scrapkit thumbelina by cora's creations HERE
font of choice i used arizonia
lets begin
elements used frame 1,butterfly,thumbelina,flower 2,3,4,5,6 and 7,paper 9,frog,lily pad
font of choice i used arizonia
1)open a new image 600 x 600 white background
2)add frame as a new layer,using magic wand click inside frame
add a new layer choice a paper i used paper 9 and paste paper into selection select none
i resized all flowers at 50% except flower 5 resized to 30%
3)duplicate flower 4 and mirror it so its like mine
4)copy and paste flower 2 and go to the pick tool and alter like mine see my tag
5)copy and paste thumbelina to your tag and resize to 85%
6)copy and paste flower 5
7)copy and paste butterfly and resize to 30% duplicate and put where you wish
add lilypad and resize to 85% and add frog and resize if needed i resized mine to 70%
8)close off your white background and medge the layers visible then resize image>resize to 500 pixels
9)reopen your white background
10)add your name,any copyright and your watermark
export as a jpeg and save your tag and your done
hope you enjoyed this tutorial :)
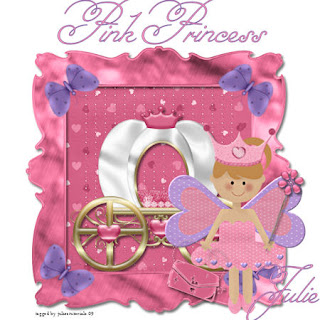
pink princess

i wrote this tutorial on the 21st of august,2009 for a contest and for juliestutorials.
A knowledege of paintshop pro is needed
paintshop pro i used version 12
supplies needed
Princess tube is in the kit
scrapkit used called Little Miss Princess by bits n bobs HERE
you can buy the kit here HERE
all elements used are in the kit frame1,bling string 2,princess,crown 2,pin 1,carriage 2,bag 2,butterfly 2,
open a new image 600x600 white background
copy and paste frame as a new layer
pick a paper of your choice i'm using paper 1
using magic wand click inside your frame and go to selections
modify>expand by 4 add a new raster layer and copy and paste paper into selection select none
and
drag paper layer under your frame
copy and paste your bling string and resize to your liking
copy and paste the princess and resize to 85%
copy and paste your crown to your image and resize to 75% then resize again by
90%,i also rotated my crown i used the pick tool and i placed mine on the princesses head
add the pin and resize to 70% and place the pin where i have mine,go to image>free rotate 20% to the right
copy and paste your carraige as a new layer and see my tag for placement
copy and paste the bag as a new layer,then go to image>mirror and also resize bag by 40%
and put the bag into the other hand of the princess,add a drop shadow to the bag
copy and paste your butterfly and resize to 30%
next rotate your butterfly free rotate 20% to the left duplicate your butterfly 3 times
and see my tag for placement of all butterflys
add word art,your name and any watermark,merge visible and save tag as a jpeg
hope you enjoyed my tutorial and thank you for trying it :)
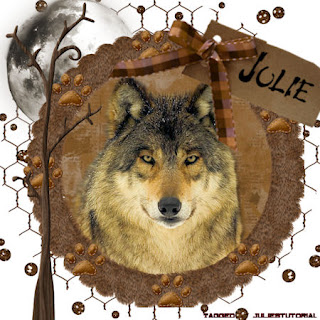
jacobs wolf

i wrote this tut on 21st of august for julies tutorials
supplies needed
A knowledege of paintshop pro
paintshop pro i used version 12
scrapkit its called jacob by Coras Creations you can buy it from here HERE
tube unknown got from a group i was in,if anyone knows of the artists if you could let me
know please so i can remove if needed or give credit to ,thanks :)
font used wolfs rain
Elements used from kit frame 3,chicken wire,glitter gel,moon,paw print,tree and tag
1)open a new image 600 x 600 transparent
2)copy and paste frame 3 as a new layer to your image and using the magic wand
click inside your frame,
and go to selections>modify>expand by 4 and add a new raster layer
3)copy and paste a paper of your choice i used paper 5 and paste into selection
4)add the paw prints and resize to 60% duplicate paw prints and place around your frame like mine
5)add all other elements and place where you wish or see my tag for reference
6)copy and paste your tube of your choice to the image
7)add a new raster layer and flood fill with white and send to the bottom of your layer palette
add any copyright,watermark merge visible,i resized mine to 450 pixels and save as a jpeg
and thats it your done
hope you enjoyed this tutorial,thank you for trying it :)
Thursday 20 August 2009
angellic

i wrote this tut on 20th of august for julies tutorials
angellic
supplies needed
A knowledege of paintshop pro
paintshop pro i used version 12
gorgeous scrapkit is by cora called angellic thanks sweetie HERE
tube is by jamie kid HERE
font i used is called Aphrodite Pro
1)open a new image white background 550 x 550
2)paste frame 1 as a new layer and resize to 70%
using magic wand click inside your frame,
3)go to selections>modify>expand by 2
add a new raster layer and
paste paper of your choice i used paper 11 and drag paper layer under
frame layer
4)paste your tube onto canvas and resize if needed
5)add you elements see mine for placement i used cc star,angellic splash,paper stars
sparkle stars,heart doodle,bow 1,star splash.
6)add your name and any copyrights
save your tag as a jpeg and your done ,hope you enjoyed this tutorial
Saturday 15 August 2009
hello and i'm back
hello,sorry ive not been around lately,i;ve had swine flu and just managed to get better for my holiday on the 1st of august went on a boating holiday on the norfolk broads was my first time on a boating holiday it was so hot very peaceful and so relaxing,will have more tuts for you very soon ,have a lovely weekend and bye for now xox
Subscribe to:
Posts (Atom)


