Friday 21 December 2012

blue christmas


I Wrote This Tut On 21ST Of   December,2012 For Julies Tutorials
Any Resemblance To Any Other Tutorials Is Purely Coincidental.

Supplies needed

Paint shop pro,I use version 12,but any version is ok 
A knowledge of paint shop pro is needed

Other supplies needed

Scrap kit  used snowflake kisses is  by  evol angel scrapz
Tube of your choice I'm using a tube  by   Ismael Rac
you need a license to use his work purchase from HERE
Mask 56 used is by weescotslass creations

Font of your choice 


Lets begin

go to selections>select all 
Copy and paste a paper from your kit 
right click your tag and copy>paste into selection>Select none 

next,go to layers>load/save mask>load mask from disk,choose a mask 
and apply it,then merge group 


copy and paste Frame2 as new layer and With the magic wand 
click inside frame>go to selections>modify>expand by 5 click ok

Add new raster layer drag under frame.
Copy and paste paper  into selection.
then Select none.


copy and paste a tube of your choice and resize if required 


you can start to add the elements to your tag and resize if required and place anywhere
on your tag , i used the following


WinterSwirl
Wordart2
XmasLights
Tree
Wand
WinterMoon
Sparkles1
Sparkles2
Sign
Snow
Poinsetta
HangingBaubles
SnowflakeDoodle
SnowflakeLolly


if you have finished adding elements from your kit choose a color or paper
and add your text using a font of your choice 

please make sure you add copyright of the tube artist you used or if you used no tube
the scrapkit artists

once all done,merge your tag visible go to resize if you wish 


go to file>export and save as a JPEG OR PNG 


your all done ,i hope you enjoyed doing my tutorials always remember my tuts are 
just a guard for you so have fun,thanks very much hugs from julie x


Monday 10 December 2012

oh christmas tree


I wrote this tut on 10th  of December ,2012 for julies tutorials
Any resemblance to any other tutorials is purely coincidental.

Supplies needed

You also need paint shop pro,I use version 12,any other version will do 
A knowledge of paint shop pro is needed

Other supplies needed

Scrap kit  No peekin  by  jens sweet temptations
You can buy this kit from Here

template is   by Dee 
Tube of choice 
mask 336 used is by weescotslass creations
Font of your choice  

Lets begin


Open template,delete copyright info

activate each layer,using your magic wand click inside each part
and either choose a color or use a paper from the kit your using  


Select all,Copy and paste a paper  into selection
Select none,Apply mask
Then Merge group.


go to layers and add a new raster layer and floodfill with write
and drag underneath the mask layer  


once you have completed each layer to your liking add some elements from the kit 


Copy and paste any elements of your choice or use the ones that i did
And please see my tag for placement of elements 

I used these's elements as follows:


Bells1
Girl N Deer
Lights
Bow1
Elf
Tree1
Train
Christmas Sign
Gifts


Copy and paste a tube of your choice or use one of the cookies
that come with the kit And resize if needed.


Choose 2 colors to write out your name with a font
Of your choice. 


Add any copyrights and watermarks,Merge all layers visible 


resize your tag if needed,I always Resize mine to 500 pixels


Go to file>export and save as JPEG or png


Thanks for trying out my tut ,hope you enjoyed it,if you have
Any questions or comments please leave me a comment  :)

Rustic Xmas


I Wrote This Tut On 10th Of DECEMBER,2012 For Julies Tutorials
Any Resemblance To Any Other Tutorials Is Purely Coincidental.

Supplies needed

You also need paint shop pro,I use version 12,but any version is ok 
A knowledge of paint shop pro is needed

Other supplies needed

Scrap kit  used  is white november  by   Tootypup scraps 
tube of your choice i'm using one  that comes with the kit 
Font of your choice  


Lets begin
Open a new 700x700 transparent image


copy and paste a tube of your choice and resize if required 

and then copy and paste the following elements from your kit and
arrange on your tag 

paper 4b for the mask
paper 5 for the frame 
SnowFrame_03
Bauble_02
BellsDecorated_01
Butterfly_03
Deco_03
Church_02
FlowerDeco_02
Holly_01
PineCones_02
little doll 3


add more elements if you wish too 


Add © info and name,Merge visible
And Resize as needed,then save to  jpeg or png 


Thanks for trying my tutorial hope you enjoyed it :)


Sunday 25 November 2012

There's Always Hope


I Wrote This Tut On 10th Of november,2012 For Julies Tutorials
Any Resemblance To Any Other Tutorials Is Purely Coincidental.

Supplies needed

You also need paint shop pro,I use version x3,but any version is ok
A knowledge of paint shop pro is needed

Other supplies needed

Scrap kit  used hope   is  by evolangelscrapz
http://evolangelscrapz.blogspot.com
tube of your choice ,i used a freebie tube by ismael rac
you still need a license to use the freebie
http://xeracx.net/
you can buy his amazing work HERE
http://store.xeracx.net/
mask 34  used is by weescotslass creations
http://weescotslasscreations.blogspot.com/
Font of your choice


Lets begin
Open a new 700x700 transparent image
Select all,Copy and paste paper 7 into selection
Then Merge group.


copy and paste frame2  as new layer and
With the magic wand click inside frame.
Expand selection by 5


Add new raster layer under frame.
Copy and paste paper 1 into selection.
Select none.


copy and paste a tube of your choice and resize if required

and then copy and paste the following elements from your kit and
arrange on your tag

EAS_Wordart1
EAS_AwarenessRibbon2
EAS_BeadedString
EAS_Bra
EAS_Dove
EAS_Flower3
EAS_GlitterSwirl
EAS_HeartNString
EAS_HeartSpray
EAS_Sparkles
EAS_Roses


Add © info and name,Merge visible
And Resize as needed.

Thanks for trying my tutorial hope you enjoyed it :)


Tuesday 20 November 2012

bEWARE


I Wrote This Tut On 20th  Of   NOVEMBER,2012 For Julies Tutorials
Any Resemblance To Any Other Tutorials Is Purely Coincidental.

Supplies needed

Paint shop pro,I use version 12,but any version is ok
A knowledge of paint shop pro is needed

Other supplies needed

Scrap kit  used  is FRIGHT NIGHT   by  designs by stina
Tube of your choice I'm using a tube  by   Ismael Rac
http://xeracx.net/
you need a license to use his work purchase from HERE
http://store.xeracx.net/
Mask 363 used is by weescotslass creations
http://weescotslasscreations.blogspot.com/

Font of your choice


Lets begin

go to selections>select all
Copy and paste a paper from your kit
right click your tag and copy>paste into selection>Select none

next,go to layers>load/save mask>load mask from disk,choose a mask
and apply it,then merge group


copy and paste Frame02  as new layer and With the magic wand
click inside frame>go to selections>modify>expand by 5 click ok

Add new raster layer drag under frame.
Copy and paste paper  into selection.
then Select none.


copy and paste a tube of your choice and resize if required


you can start to add the elements to your tag and resize if required and place anywhere
on your tag , i used the following


DBS_Bow04
DBS_BlackCat
DBS_CautionTape02
DBS_Fog
DBS_Cleaver
DBS_Goblin
DBS_LeafyVine
DBS_Raven
DBS_ScarySkulls
DBS_Skeleton
DBS_Spider


if you have finished adding elements from your kit choose a color or paper
and add your text using a font of your choice

please make sure you add copyright of the tube artist you used or if you used no tube
the scrapkit artists

once all done,merge your tag visible go to resize if you wish


go to file>export and save as a JPEG OR PNG


your all done ,i hope you enjoyed doing my tutorials always remember my tuts are
just a guard for you so have fun,thanks very much hugs from julie x


Friday 16 November 2012

BooHoo


I Wrote This Tut On 15th Of  November ,2012 For Julies Tutorials
Any Resemblance To Any Other Tutorials Is Purely Coincidental.

Supplies needed

Paint shop pro,I use version 12,but any version is ok
A knowledge of paint shop pro is needed

Other supplies needed

Scrap kit  used boolloween   is  by Chichi Designz
http://chichidesignz2.blogspot.com/
Tube of your choice I'm using a tube  by   Ismael Rac
http://xeracx.net/
you need a license to use his work purchase from HERE
Mask 301 and 363 used is by weescotslass creations


Font of your choice


Lets begin

go to selections>select all
Copy and paste a paper from your kit
right click your tag and copy>paste into selection>Select none

next,go to layers>load/save mask>load mask from disk,choose a mask
and apply it,then merge group


copy and paste Frame as new layer and With the magic wand
click inside frame>go to selections>modify>expand by 5 click ok

Add new raster layer drag under frame.
Copy and paste paper  into selection.
then Select none.


copy and paste a tube of your choice and resize if required


you can start to add the elements to your tag and resize if required and place anywhere
on your tag , i used the following

Bats
BloodDrip
BowPuppet
Brush
ButcherKnife
Crows
Ghost
Moon
Tree
Wordart
BloodyFlower


if you have finished adding elements from your kit choose a color or paper
and add your text using a font of your choice

please make sure you add copyright of the tube artist you used or if you used no tube
the scrapkit artists

once all done,merge your tag visible go to resize if you wish


go to file>export and save as a JPEG OR PNG


your all done ,i hope you enjoyed doing my tutorials always remember my tuts are
just a guard for you so have fun,thanks very much hugs from julie x


Saturday 20 October 2012

Happy Halloween

I wrote this tut on 20th  of october,2012 for julies tutorials
Any resemblance to any other tutorials is purely coincidental.

Supplies needed

You also need paint shop pro,I use version 12
A knowledge of paint shop pro is needed

Other supplies needed

Scrap kit bling on halloween  by  Jens Sweet Temptations
You can buy this kit from Here
template   by tracey f
Tube of choice I'm using one thats in the kit
Font of your choice 

Lets begin


Open template,delete copyright info


activate each layer,using your magic wand click inside each part
and either choose a color or use a paper from the kit your using 


once you have completed each layer to your liking add some elements from the kit


Copy and paste any elements of your choice or use the ones that i did
And please see my tag for placement of elements

I used these's elements as follows:

Bats
Cauldron
Girl
Grim
Moon
Candle1
Pumpkin Stack
Pennet
Skull1
Spider Web
Tombstone1
Witch Hat


Copy and paste a tube of your choice or use one of the cookies
that come with the kit And resize if needed,i resized mine to 400 pixels


Choose 2 colors to write out your name with a font
Of your choice.


Add any copyrights and watermarks,Merge all layers visible


resize your tag if needed,I always Resize mine to 500 pixels


Go to file>export and save as JPEG or png


Thanks for trying out my tut ,hope you enjoyed it,if you have
Any questions or comments please leave me a comment  :)

Tuesday 16 October 2012

Boo 2 u Too

I wrote this tut on 10TH of OCTOBER,2012 for julies tutorials
Any resemblance to any other tutorials is purely coincidental.

Supplies needed

You also need paint shop pro,I use version 12
A knowledge of paint shop pro is needed

plugins>xenofex 2 constellation

Other supplies needed

Scrap kit spider witch  by evolangelscrapz
You can buy this kit from Here
template   by DEE http://deessigndepot.blogspot.com/
Tube of choice i did not use one
mask 117  used is by weescotslass creations
Font of your choice 

Lets begin


Open template,delete copyright info

activate each layer,using your magic wand click inside each part
and either choose a color or use a paper from the kit your using 


Select all,Copy and paste paper 1  into selection
Select none,Apply mask
Then Merge group.


go to layers and add a new raster layer and floodfill with write
and drag underneath the mask layer 


once you have completed each layer to your liking add some elements from the kit


Copy and paste any elements of your choice or use the ones that i did
And please see my tag for placement of elements

I used these's elements as follows:

BlackKitty
Border
Bow2
Charm
Broom
Cauldron
Moon
Sparkles1
Sparkles2
SpookyTree
Witch
Web (i animated the web )


Copy and paste a tube of your choice or use one of the cookies
that come with the kit And resize if needed,i resized mine to 400 pixels


Choose 2 colors to write out your name with a font
Of your choice.


Add any copyrights and watermarks,Merge all layers visible if you aint going
to animate the web


resize your tag if needed,I always Resize mine to 500 pixels


Go to file>export and save as JPEG or png


TO ANIMATE WEB

Duplicate the web twice to make 3

activate the first layer and go to effects>plugins>xenofex 2 constellation

with these's settings see below


next activate the next duplicated layer leave everything how it is except
press random seed once then press ok and do the same with your last web layer

close off the top 2 duplicated web layers


open up animation shop

make sure the first web layer is activated
Right click your tag and copy merged

open animation shop

edit and paste as a new animation

go back into paintshop close off web 1 and
open the next one and back into animation
right click your tag and paste after current frame

and then do the same with your last web layer

click edit and select all

go to animation and resize your tag i resized
 mine to 500 height


view your animation if happy go to file and save as gif


Thanks for trying out my tut ,hope you enjoyed it,if you have
Any questions or comments please leave me a comment  :)

Tuesday 25 September 2012

music of love

I Wrote This Tut On 24th Of september  ,2012 For Julies Tutorials
Any Resemblance To Any Other Tutorials Is Purely Coincidental.

Supplies needed

Paint shop pro,I use version 12,but any version is ok
A knowledge of paint shop pro is needed

Other supplies needed

Scrap kit  used   is music of the night by Tootypup scraps
Tube of your choice I'm using a tube  by dark yarrow
which i brought from MPT which is closed now
you need a license to use his work purchase from HERE
Mask 363 used is by weescotslass creations

Font of your choice


Lets begin

go to selections>select all
Copy and paste a paper from your kit
right click your tag and copy>paste into selection>Select none

next,go to layers>load/save mask>load mask from disk,choose a mask
and apply it,then merge group


copy and paste ClusterFrame_01 as new layer and With the magic wand
click inside frame>go to selections>modify>expand by 5 click ok

Add new raster layer drag under frame.
Copy and paste a paper into selection.
then Select none.


copy and paste a tube of your choice and resize if required


you can start to add the elements to your tag and resize if required and place anywhere
on your tag , i used the following

BarMusic_02
ButterflyDeco_01
RoseBloom_15
Fan_02
Heart_02
KeyRing_01
Mask_02
MusicNotes_01
Rose_01
SheetMusic


if you have finished adding elements from your kit choose a color or paper
and add your text using a font of your choice

please make sure you add copyright of the tube artist you used or if you used no tube
the scrapkit artists

once all done,merge your tag visible go to resize if you wish


go to file>export and save as a JPEG OR PNG


your all done ,i hope you enjoyed doing my tutorials always remember my tuts are
just a guard for you so have fun,thanks very much hugs from julie x


Wednesday 19 September 2012

Twilight Falls

I Wrote This Tut On 15TH Of september,2012 For Julies Tutorials
Any Resemblance To Any Other Tutorials Is Purely Coincidental.

Supplies needed

You also need paint shop pro,I use version x3,but any version is ok
A knowledge of paint shop pro is needed

Other supplies needed

Scrap kit  used Autumn Eve  is  by gina gem scraps
tube of your choice,i did not use one 
mask 59 used is by weescotslass creations
Font of your choice


Lets begin
Open a new 700x700 transparent image
Select all,Copy and paste paper 21 into selection
Then Merge group.


copy and paste Frame 5 as new layer and
With the magic wand click inside frame.
Expand selection by 5


Add new raster layer under frame.
Copy and paste paper 2 into selection.
Select none.


copy and paste a tube of your choice and resize if required

and then copy and paste the following elements from your kit and
arrange on your tag

Acorn Branch 2
 Butterfly 4
 Leaf 3
Autumn Leaf 4
Autumn Leaf 2
Banner 2
Beads Element 2
Berries 1
Berry Branch 1
Blossom 1
Berry Branch 2
Blossom Leaves 2
Bow 5
Wax Seal 3
Twilight Lights
Leaf Spray 1
Cluster 1
Brush 1
Branch


Add © info and name,Merge visible
And Resize as needed.

Thanks for trying my tutorial hope you enjoyed it :)


Emos Rock

I Wrote This Tut On 15th Of september,2012 For Julies Tutorials
Any Resemblance To Any Other Tutorials Is Purely Coincidental.

Supplies needed

You also need paint shop pro,I use version x3,but any version is ok
A knowledge of paint shop pro is needed

Other supplies needed

Scrap kit  used NoEmoshun  is  by Jens Sweet Temptations 
tube of your choice OR Use one from the kit i'm using a COOKIE BY Krissy's Imaging 
mask 6 used is by weescotslass creations
Font of your choice


Lets begin
Open a new 700x700 transparent image
Select all,Copy and paste paper 11  into selection
Select none,Apply mask
Then Merge group.


i duplicated the mask layer 3 times to make 4


copy and paste Frame1 as new layer and
With the magic wand click inside frame.
Expand selection by 5


Add new raster layer under frame.
Copy and paste paper 8 into selection.
Select none.


copy and paste a tube of your choice and resize if required

and then copy and paste the following elements from your kit and
arrange on your tag

Emoshun 2-4
BFly1
Bird
bow2
Cake Pop
Candy1
Candy2
Candy3
Candy4
Heart1
Lips


Add © info and name,Merge visible
And Resize as needed.

Thanks for trying my tutorial hope you enjoyed it :)


Wednesday 12 September 2012

dreams and fantasy


I Wrote This Tut On 11th  Of september  ,2012 For Julies Tutorials
Any Resemblance To Any Other Tutorials Is Purely Coincidental.

Supplies needed

Paint shop pro,I use version 12,but any version is ok
A knowledge of paint shop pro is needed

Other supplies needed

Scrap kit  used sealife  is  by Chichi Designz
http://chichidesignz2.blogspot.com/ Tube of your choice I'm using a tube  by  ted hammond
you need a license to use his work purchase from CDO
Mask 133 used is by weescotslass creations


Font of your choice


Lets begin

go to selections>select all
Copy and paste a paper from your kit
right click your tag and copy>paste into selection>Select none

next,go to layers>load/save mask>load mask from disk,choose a mask
and apply it,then merge group


copy and paste Frame1 as new layer and With the magic wand
click inside frame>go to selections>modify>expand by 5 click ok

Add new raster layer drag under frame.
Copy and paste paper  into selection.
then Select none.


copy and paste a tube of your choice and resize if required


you can start to add the elements to your tag and resize if required and place anywhere
on your tag , i used the following

WordArt
Wave
Sun
StarSparkle
Sparkles
Smudges1
Seashell3
Seagull1
Ribbon2
Plant
Smudges
Pearls
Grass2
Flower1


if you have finished adding elements from your kit choose a color or paper
and add your text using a font of your choice

please make sure you add copyright of the tube artist you used or if you used no tube
the scrapkit artists

once all done,merge your tag visible go to resize if you wish


go to file>export and save as a JPEG OR PNG


your all done ,i hope you enjoyed doing my tutorials always remember my tuts are
just a guard for you so have fun,thanks very much hugs from julie x


So Sweet

I Wrote This Tut On 11th Of september,2012 For Julies Tutorials
Any Resemblance To Any Other Tutorials Is Purely Coincidental.

Supplies needed

Paint shop pro,I use version x3,but any version is ok
A knowledge of paint shop pro is needed

Other supplies needed

Scrap kit  used girl you are is  by Angeldesignz
Tube of your choice
Mask 192 used is by weescotslass creations
Font of your choice


Font of your choice


Lets begin

go to selections>select all
Copy and paste a paper from your kit
right click your tag and copy>paste into selection>Select none

next,go to layers>load/save mask>load mask from disk,choose a mask
and apply it,then merge group


copy and paste Frame2 as new layer and With the magic wand
click inside frame>go to selections>modify>expand by 5 click ok

Add new raster layer drag under frame.
Copy and paste a paper into selection.
then Select none.


copy and paste a tube of your choice and resize if required


you can start to add the elements to your tag and resize if required and place anywhere
on your tag , i used the following


Wordart3
Tree
TeddyBear
Sparkles
Bow2
Butterfly
FanDangles
Girl
Button
Doodle
Flower


if you have finished adding elements from your kit choose a color or paper
and add your text using a font of your choice

please make sure you add copyright of the tube artist you used or if you used no tube
the scrapkit artists

once all done,merge your tag visible go to resize if you wish


go to file>export and save as a JPEG OR PNG


your all done ,i hope you enjoyed doing my tutorials always remember my tuts are
just a guard for you so have fun,thanks very much hugs from julie x


Thursday 6 September 2012

Evilicious

I Wrote This Tut On 3rd Of september,2012 For Julies Tutorials
Any Resemblance To Any Other Tutorials Is Purely Coincidental.


Supplies needed

You also need paint shop pro,I use version x3
A knowledge of paint shop pro is needed

Other supplies needed

Scrap kit Wrathchild  by  designed by stina
template by cakes at crazycakesscraps.blogspot.com
Tube of choice I'm using a Poser by Butterfly Web Graphics
mask 180 used is by weescotslass creations
Font of your choice 

Lets begin


Open template,delete copyright info

activate each layer,using your magic wand click inside each part
and either choose a color or use a paper from the kit your using 


Select all,Copy and paste a paper into selection
Select none,Apply mask
Then Merge group.


once you have completed each layer to your liking add some elements from the kit


Copy and paste any elements of your choice or use the ones that i did
And please see my tag for placement of elements

I used these's elements as follows:

Wrap03
Spider01
RoseBush01
Moon
Lightning
Ghost01
Fog
Cobweb
BlackCat
Flower04
Flower02


Copy and paste a tube of your choice or use one of the cookies/posers
that come with the kit And resize if needed,i resized mine to 400 pixels


Choose 2 colors to write out your name with a font
Of your choice.


Add any copyrights and watermarks,Merge all layers visible


resize your tag if needed,I always Resize mine to 500 pixels


Go to file>export and save as JPEG or png


Thanks for trying out my tut ,hope you enjoyed it,if you have
Any questions or comments please leave me a comment  :)
 

Thursday 30 August 2012

princess of the sea's

I Wrote This Tut On 26th Of AUGUST  ,2012 For Julies Tutorials
Any Resemblance To Any Other Tutorials Is Purely Coincidental.

Supplies needed

Paint shop pro,I use version X3,but any version is ok
A knowledge of paint shop pro is needed

Other supplies needed

Scrap kit Caribbean princess used is by Tootypup Scraps
Tube of your choice I'm using a poser  which comes with the kit
and its by Elisa Design http://elisadesign1.blogspot.co.uk/
Mask 187 used is by weescotslass creations


Font of your choice


Lets begin

go to selections>select all
Copy and paste a paper from your kit
right click your tag and copy>paste into selection>Select none

next,go to layers>load/save mask>load mask from disk,choose a mask
and apply it,then merge group


copy and paste WheelFrame_04 as new layer


copy and paste a tube of your choice and resize if required


you can start to add the elements to your tag and resize if required and place anywhere
on your tag , i used the following

OldWorldNotPaper_02
TreasureChest_01
ShellDeco_02
SeaBirds_01
PiratesFlag_01
PalmTree_02
Moon_02
Clouds_02
Caribbean Princess(Mavka-Elisa-Design)_07
Anchor_01


if you have finished adding elements from your kit choose a color or paper
and add your text using a font of your choice

please make sure you add copyright of the tube artist you used or if you used no tube
the scrapkit artists

once all done,merge your tag visible go to resize if you wish


go to file>export and save as a JPEG OR PNG


your all done ,i hope you enjoyed doing my tutorials always remember my tuts are
just a guard for you so have fun,thanks very much hugs from julie x


Thursday 5 July 2012

stars&stripes

I wrote this tut on 2nd  of July ,2012 for julies tutorials
Any resemblance to any other tutorials is purely coincidental.

Supplies needed

You also need paint shop pro,I use version 12
A knowledge of paint shop pro is needed

Other supplies needed

Scrap kit  Yankee Doodle  by  Jens Sweet Temptations
template   by Schloss http://sugarcoatedtagsntuts.blogspot.fr/p/templates.html
Tube of choice I'm using one that comes with the kit
Font of your choice,i used americian cheese  

Lets begin


Open template,delete copyright info

activate each layer,using your magic wand click inside each part
and either choose a color or use a paper from the kit your using

i used

paper 10 for red circle
Paper5 for blue circle
Paper3 for red rectangle
Paper8 for map


Select all,Copy and paste paper   into selection
Select none,Apply mask
Then Merge group.


go to layers and add a new raster layer and floodfill with write
and drag underneath the mask layer 


once you have completed each layer to your liking add some elements from the kit


Copy and paste any elements of your choice or use the ones that i did
And please see my tag for placement of elements

I used these's elements as follows:

Girl
Balloon1
Balloon2
Bling1
Blocks
Bow1
Flower
Ribbon
Wand
Wand1
Bling


Copy and paste a tube of your choice or use one of the cookies
that come with the kit And resize if needed,i resized mine to 400 pixels


Choose 2 colors to write out your name with a font
Of your choice.


Add any copyrights and watermarks,Merge all layers visible


resize your tag if needed,I always Resize mine to 500 pixels


Go to file>export and save as JPEG or png


Thanks for trying out my tut ,hope you enjoyed it,if you have
Any questions or comments please leave me a comment  :)
 

Sunday 1 July 2012

Missing You

I Wrote This Tut On 1st  Of  July  ,2012 For Julies Tutorials
Any Resemblance To Any Other Tutorials Is Purely Coincidental.

Supplies needed

You also need paint shop pro,I use version 12,but any version is ok
A knowledge of paint shop pro is needed

Other supplies needed

Scrap kit  Razzle Dazzle  used   is  by   Designed by stina
tube of your choice i'm using a tube  by  unholy vault designs
you need a license to use this work purchase from HERE
mask 192  used is by weescotslass creations
Font of your choice


Lets begin
Open a new 700x700 transparent image
Select all,Copy and paste paper 10  into selection
Select none,Apply mask
Then Merge group.


go to layers and add a new raster layer and floodfill with write
and drag underneath the mask layer


copy and paste Frame02 as new layer and
With the magic wand click inside frame.
Expand selection by 5


Add new raster layer under frame.
Copy and paste paper 4 into selection.
Select none.


copy and paste a tube of your choice and resize if required

and then copy and paste the following elements from your kit and
arrange on your tag

C/P Doily  ( USING YOUR PICK TOOL STRETCH OUT SO ITS BIGGER)
C/P Bow03
C/P Brad01
C/P Butterfly01
C/P Doodle02
C/P Feather01
C/P Gem01
C/P Heart01
C/P HeartPillow01
C/P Hearts
C/P Pendant01
C/P Sparkles01


Add © info and name,Merge visible
And Resize as needed.

Thanks for trying my tutorial hope you enjoyed it :)


Friday 15 June 2012

China Girl

I Wrote This Tut On 15th  Of  June,2012 For Julies Tutorials
Any Resemblance To Any Other Tutorials Is Purely Coincidental.

Supplies needed

You also need paint shop pro,I use version 12,but any version is ok
A knowledge of paint shop pro is needed

Other supplies needed

Scrap kit  used  is blue willow  by   Tootypup scraps
tube of your choice i'm using one  that comes with the kit
Font of your choice 


Lets begin
Open a new 700x700 transparent image


copy and paste a tube of your choice and resize if required

and then copy and paste the following elements from your kit and
arrange on your tag


Screen_01
OrientalDoll_06
WillowTree_01
Lantern_03
FlowerDeco_05
Fan_02
CherryBlossomTree_02
ButterflyDeco_03
BlueWillowDeco_04
Bird_02


add more elements if you wish too


Add © info and name,Merge visible
And Resize as needed.


Thanks for trying my tutorial hope you enjoyed it :)


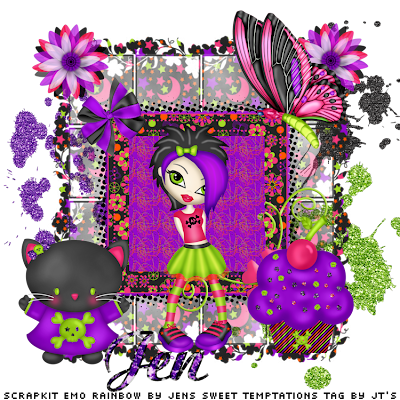
Sunday 10 June 2012

Emo Princess

 
I Wrote This Tut On 10th  Of  June ,2012 For Julies Tutorials
Any Resemblance To Any Other Tutorials Is Purely Coincidental.

Supplies needed

You also need paint shop pro,I use version 12,but any version is ok
A knowledge of paint shop pro is needed

Other supplies needed

Scrap kit  used   is Emo Rainbow  by   Jens Sweet Temptations
tube of your choice or use  the girl like i did from the kit
mask 169  used is by weescotslass creations
Font of your choice


Lets begin
Open a new 700x700 transparent image
Select all,Copy and paste paper 5  into selection
Select none,Apply mask
Then Merge group.


go to layers and add a new raster layer and floodfill with write
and drag underneath the mask layer


copy and paste Frame1 as new layer and
With the magic wand click inside frame.
Expand selection by 5


Add new raster layer under frame.
Copy and paste paper 10 into selection.
Select none.


copy and paste a tube of your choice and resize if required

and then copy and paste the following elements from your kit and
arrange on your tag

Bow
BFly1
Cupcake
Flower2
Girl
Kitty
Splat1
Splat
Splat2


Add © info and name,Merge visible
And Resize as needed.

Thanks for trying my tutorial hope you enjoyed it :)


Friday 1 June 2012

Fantasy Land

I Wrote This Tut On 24th  Of   May,2012 For Julies Tutorials
Any Resemblance To Any Other Tutorials Is Purely Coincidental.

Supplies needed

You also need paint shop pro,I use version 12,but any version is ok
A knowledge of paint shop pro is needed

Other supplies needed

Scrap kit  used Florality  is  by  Chichi Designz 
no tube used 
mask 167  used is by weescotslass creations 
Font of your choice


Lets begin
Open a new 700x700 transparent image
Select all,Copy and paste paper   into selection
Select none,Apply mask
Then Merge group.


go to layers and add a new raster layer and floodfill with write
and drag underneath the mask layer


copy and paste  as new layer and
With the magic wand click inside frame.
Expand selection by 5


Add new raster layer under frame.
Copy and paste paper  into selection.
Select none.


copy and paste a tube of your choice and resize if required

and then copy and paste the following elements from your kit and
arrange on your tag

Frame1_CD_Florality
Rainbow_CD_Florality
Brush_CD_Florality
Bow1_CD_Florality
WingedHeart_CD_Florality
Tullip_CD_Florality
Bird_CD_Florality
Branch_CD_Florality
BubbleTrail_CD_Florality
Bunny_CD_Florality
DandelionSeeds_CD_Florality
Firework_CD_Florality
BubbleStar_CD_Florality
FlowerBrush1_CD_Florality
Flowers_CD_Florality
Leaves_CD_Florality
Plant_CD_Florality
Ribbon_CD_Florality
Sparkle1_CD_Florality
Sun_CD_Florality
Swirl_CD_Florality


Add © info and name,Merge visible
And Resize as needed.

Thanks for trying my tutorial hope you enjoyed it :)


Thursday 31 May 2012

Sparkle of magic dust

I Wrote This Tut On 24th  Of  May ,2012 For Julies Tutorials
Any Resemblance To Any Other Tutorials Is Purely Coincidental.

Supplies needed

You also need paint shop pro,I use version 12,but any version is ok
A knowledge of paint shop pro is needed

Other supplies needed

Scrap kit  used Emo Fairy 2  is  by   Angels Designz
tube of your choice,i used the fairy from the kit
mask 117 used is by weescotslass creations
Font of your choice


Lets begin
Open a new 700x700 transparent image
Select all,Copy and paste paper 1  into selection
Select none,Apply mask
Then Merge group.


go to layers and add a new raster layer and floodfill with write
and drag underneath the mask layer


copy and paste Frame1 as new layer and
With the magic wand click inside frame.
Expand selection by 5


Add new raster layer under frame.
Copy and paste paper 2 into selection.
Select none.


copy and paste a tube of your choice and resize if required

and then copy and paste the following elements from your kit and
arrange on your tag

AD_Fairy
AD_Bow2
AD_Butterflies
AD_CatOnSkull
AD_Chain
AD_Clouds
AD_FairyDust
AD_Cupcake2
AD_GothicChocoHeart
AD_Moon
AD_Lantern
AD_Potion1
AD_Sparkles1


Add © info and name,Merge visible
And Resize as needed.

Thanks for trying my tutorial hope you enjoyed it :)


Thursday 24 May 2012

Lost In You

I wrote this tut on 24th of May ,2012 for julies tutorials
Any resemblance to any other tutorials is purely coincidental.

Supplies needed

You also need paint shop pro,I use version 12
A knowledge of paint shop pro is needed

Other supplies needed

Scrap kit The Blue Butterfly  by  designed by stina
template   by DEE http://deessigndepot.blogspot.com/
Tube of choice I'm using steve baier http://www.scbartworks.com/
you need a license to use this work purchase from HERE
mask 116 used is by weescotslass creations
Font of your choice 

Lets begin


Open template,delete copyright info

activate each layer,using your magic wand click inside each part
and either choose a color or use a paper from the kit your using 


Select all,Copy and paste paper   into selection
Select none,Apply mask
Then Merge group.


go to layers and add a new raster layer and floodfill with write
and drag underneath the mask layer 


once you have completed each layer to your liking add some elements from the kit


Copy and paste any elements of your choice or use the ones that i did
And please see my tag for placement of elements

I used these's elements as follows:

DBS_BlueFlowers01
DBS_Bow04
DBS_Butterfly04
DBS_Flower01
DBS_Flower03
DBS_Heart02
DBS_Hearts01
DBS_Hearts03
DBS_Ribbon04


Copy and paste a tube of your choice or use one of the cookies
that come with the kit And resize if needed,i resized mine to 400 pixels


Choose 2 colors to write out your name with a font
Of your choice.


Add any copyrights and watermarks,Merge all layers visible


resize your tag if needed,I always Resize mine to 500 pixels


Go to file>export and save as JPEG or png


Thanks for trying out my tut ,hope you enjoyed it,if you have
Any questions or comments please leave me a comment  :)
 

Sunday 6 May 2012

Emo princess

I wrote this tut on 6th  of May ,2012 for julies tutorials
Any resemblance to any other tutorials is purely coincidental.

Supplies needed

You also need paint shop pro,I use version 12
A knowledge of paint shop pro is needed

Other supplies needed

Scrap kit  Emo Fairy  by  Angels Designz
template   by cakes at crazycakesscraps.blogspot.com
Tube of choice I'm using very many
you need a license to use this work purchase from HERE
mask 116 used is by weescotslass creations
Font of your choice 

Lets begin


Open template,delete copyright info

activate each layer,using your magic wand click inside each part
and either choose a color or use a paper from the kit your using 


Select all,Copy and paste paper   into selection
Select none,Apply mask
Then Merge group.


go to layers and add a new raster layer and floodfill with write
and drag underneath the mask layer 


once you have completed each layer to your liking add some elements from the kit


Copy and paste any elements of your choice or use the ones that i did
And please see my tag for placement of elements

I used these's elements as follows:

AD_Bow1
AD_Wire
AD_SpikedHeart
AD_String
AD_Web
AD_Sparkles2
AD_Skulls
AD_Skull1
AD_Ribbon2
AD_Moon
AD_Girl
AD_Fairy


Copy and paste a tube of your choice  And resize if needed,i resized mine to 400 pixels


Choose 2 colors to write out your name with a font
Of your choice.


Add any copyrights and watermarks,Merge all layers visible


resize your tag if needed,I always Resize mine to 500 pixels


Go to file>export and save as JPEG or png


Thanks for trying out my tut ,hope you enjoyed it,if you have
Any questions or comments please leave me a comment,many thanks   :)
 

Monday 23 April 2012

By The Sea

I Wrote This Tut On 20th  Of  April ,2012 For Julies Tutorials
Any Resemblance To Any Other Tutorials Is Purely Coincidental.

Supplies needed

You also need paint shop pro,I use version 12,but any version is ok
A knowledge of paint shop pro is needed

Other supplies needed

Scrap kit  used Mermaids Frolic  is  by  Tootypup Scraps
tube of your choice i'm using a Mermaid poser which comes with the kit and is by Arduino
mask 222  used is by weescotslass creations
Font of your choice


Lets begin
Open a new 700x700 transparent image
Select all,Copy and paste a paper  into selection
Select none,Apply mask
Then Merge group.


go to layers and add a new raster layer and floodfill with write
and drag underneath the mask layer


copy and paste FramePlain_02 as new layer and
With the magic wand click inside frame.
Expand selection by 5


Add new raster layer under frame.
Copy and paste a paper  into selection.
Select none.


copy and paste a tube of your choice and resize if required

and then copy and paste the following elements from your kit and
arrange on your tag

TP_BeachRocks_01
TP_Anchor_03
TP_Bubbles_01
TP_Deco_01
TP_Fish_03
TP_JellyFish_03
TP_Heart_04
TP_Leaves_03
TP_MermaidsFrolic_10
TP_WaterSplash_01
TP_SwirlDeco_01
TP_StarFish_02
TP_Shell_00


Add © info and name,Merge visible
And Resize as needed.

Thanks for trying my tutorial hope you enjoyed it :)


Friday 20 April 2012

Be My Bunnygirl

I wrote this tut on 20th  of april ,2012 for julies tutorials
Any resemblance to any other tutorials is purely coincidental.

Supplies needed

You also need paint shop pro,I use version 12
A knowledge of paint shop pro is needed

Other supplies needed

Scrap kit bunny love  by  Angel designz
template   by cakes at crazycakesscraps.blogspot.com
Tube of choice I'm using  jose a cano http://jocachi.clanteam.com/
i brought this tube when he was with another store the link to buy is below
you need a license to use this work purchase from HERE
Font of your choice 

Lets begin


Open template,delete copyright info

activate each layer,using your magic wand click inside each part
and either choose a color or use a paper from the kit your using 


Select all,Copy and paste a paper  into selection
Select none,Apply mask
Then Merge group.


go to layers and add a new raster layer and floodfill with write
and drag underneath the mask layer 


once you have completed each layer to your liking add some elements from the kit


Copy and paste any elements of your choice or use the ones that i did
And please see my tag for placement of elements

I used these's elements as follows:

AD_Bunny
AD_Balloon
AD_Butterfly2
AD_Carrots
AD_ChocolateBunny
AD_Cupcake
AD_Flower2
AD_Grass
AD_HeartSpray
AD_Rainbow
AD_Sparkles


Copy and paste a tube of your choice or use one of the cookies
that come with the kit And resize if needed,i resized mine to 400 pixels


Choose 2 colors to write out your name with a font
Of your choice.


Add any copyrights and watermarks,Merge all layers visible


resize your tag if needed,I always Resize mine to 500 pixels


Go to file>export and save as JPEG or png


Thanks for trying out my tut ,hope you enjoyed it,if you have
Any questions or comments please leave me a comment  :)

Friday 30 March 2012

living like a rackstar

 I wrote this tut on 30TH  of March ,2012 for julies tutorials
Any resemblance to any other tutorials is purely coincidental.

Supplies needed

You also need paint shop pro,I use version 12
A knowledge of paint shop pro is needed

Other supplies needed

Scrap kit  Rock on  by  angelsdesignz
template 96  by beth http://BLISSFULLYBETH.BLOGSPOT.COM/
Tube of choice I'm using ISMAEL RAC
you need a license to use this work purchase from HERE 
mask 221 used is by Weescotslass creations
Font of your choice

Lets begin


Open template,delete copyright info

activate each layer,using your magic wand click inside each part
and either choose a color or use a paper from the kit your using


Select all,Copy and paste paper   into selection
Select none,Apply mask
Then Merge group.


go to layers and add a new raster layer and floodfill with write
and drag underneath the mask layer


once you have completed each layer to your liking add some elements from the kit


Copy and paste any elements of your choice or use the ones that i did
And please see my tag for placement of elements

I used these's elements as follows:

Wire
Beaded String
Bow1
Wordart1
Sparkles2
Sucker1
SkullPolish
Skull3
RazorBlade
PianoKeys
Music
GlitterTrail
Doodle2
Flames
DrumSticks


Copy and paste a tube of your choice or use one of the cookies
that come with the kit And resize if needed,i resized mine to 400 pixels


Choose 2 colors to write out your name with a font
Of your choice.


Add any copyrights and watermarks,Merge all layers visible


resize your tag if needed,I always Resize mine to 500 pixels


Go to file>export and save as JPEG or png


Thanks for trying out my tut ,hope you enjoyed it,if you have
Any questions or comments please leave me a comment  :)
 

dark n spooky


I Wrote This Tut On 30th  Of March,2012 For Julies Tutorials
Any Resemblance To Any Other Tutorials Is Purely Coincidental.

Supplies needed

Paint shop pro,I use version 12,but any version is ok
A knowledge of paint shop pro is needed

Other supplies needed

Scrap kit  creeped used  is  by Chichi Designz 
Tube of your choice I'm using a tube  by Dark yarrow
you need a license to use this work purchase from HERE
Mask 222 used is by weescotslass creations
Font of your choice


Lets begin

go to selections>select all
Copy and paste a paper from your kit
right click your tag and copy>paste into selection>Select none

next,go to layers>load/save mask>load mask from disk,choose a mask
and apply it,then merge group


copy and paste Frame1 as new layer and With the magic wand
click inside frame>go to selections>modify>expand by 5 click ok

Add new raster layer drag under frame.
Copy and paste paper  into selection.
then Select none.


copy and paste a tube of your choice and resize if required


you can start to add the elements to your tag and resize if required and place anywhere
on your tag , i used the following

BarbedWire
Bat
BlackRose
BloodBlade
Bows
Cloud1
Cloud
Wire
Wolf
Crow
GlitterBling
Jewel
Wings
Web
SkullRose


if you have finished adding elements from your kit choose a color or paper
and add your text using a font of your choice

please make sure you add copyright of the tube artist you used or if you used no tube
the scrapkit artists

once all done,merge your tag visible go to resize if you wish


go to file>export and save as a JPEG OR PNG


your all done ,i hope you enjoyed doing my tutorials always remember my tuts are
just a guard for you so have fun,thanks very much hugs from julie x

Lucky

I Wrote This Tut On 30th  Of   March,2012 For Julies Tutorials
Any Resemblance To Any Other Tutorials Is Purely Coincidental.

Supplies needed

Paint shop pro,I use version 12,but any version is ok
A knowledge of paint shop pro is needed

Other supplies needed

Scrap kit The Clover Fairy  used   is  by  designed by stina
Tube of your choice,i used a poser by medievilcreations ,which comes with the kit
Mask 222 used is by weescotslass creations
Font of your choice


Lets begin

go to selections>select all
Copy and paste a paper from your kit
right click your tag and copy>paste into selection>Select none

next,go to layers>load/save mask>load mask from disk,choose a mask
and apply it,then merge group


copy and paste Frame06 as new layer and With the magic wand
click inside frame>go to selections>modify>expand by 5 click ok

Add new raster layer drag under frame.
Copy and paste paper  into selection.
then Select none.


copy and paste a tube of your choice and resize if required


you can start to add the elements to your tag and resize if required and place anywhere
on your tag , i used the following


DBS_Bow01
DBS_Clover01
DBS_CloverFlag
DBS_CloverScatter01
DBS_FairyHouse02
DBS_GlitterClover
DBS_Horseshoe
DBS_medi_Fairy05
DBS_Scatter


if you have finished adding elements from your kit choose a color or paper
and add your text using a font of your choice

please make sure you add copyright of the tube artist you used or if you used no tube
the scrapkit artists

once all done,merge your tag visible go to resize if you wish


go to file>export and save as a JPEG OR PNG


your all done ,i hope you enjoyed doing my tutorials always remember my tuts are
just a guard for you so have fun,thanks very much hugs from julie x

Monday 19 March 2012

EggScuse


I wrote this tut on 19th  of March,2012 for julies tutorials
Any resemblance to any other tutorials is purely coincidental.

Supplies needed

You also need paint shop pro,I use version 12
A knowledge of paint shop pro is needed

Other supplies needed

Scrap kit  Easter Elegance   by  Tootypup Scrap
template  by lovely http://lovelysshack.blogspot.com/
Tube of choice I'm using Jose Cano,i brought this tube when he was at
another store he now sells at the link below
you need a license to use this work purchase from HERE
mask 117 used is by weescotslass creations
Font of your choice 

Lets begin


Open template,delete copyright info

activate each layer,using your magic wand click inside each part
and either choose a color or use a paper from the kit your using 


Select all,Copy and paste paper   into selection
Select none,Apply mask
Then Merge group.


go to layers and add a new raster layer and floodfill with write
and drag underneath the mask layer 


once you have completed each layer to your liking add some elements from the kit


Copy and paste any elements of your choice or use the ones that i did
And please see my tag for placement of elements

I used these's elements as follows:

Bow_01
Butterfly_02
DecoVine_01
Egg
FlowerCluster_01
Heart_03
Rabbit_02
Ribbon_04


Copy and paste a tube of your choice or use one of the cookies
that come with the kit And resize if needed,i resized mine to 400 pixels


Choose 2 colors to write out your name with a font
Of your choice.


Add any copyrights and watermarks,Merge all layers visible


resize your tag if needed,I always Resize mine to 500 pixels


Go to file>export and save as JPEG or png


Thanks for trying out my tut ,hope you enjoyed it,if you have
Any questions or comments please leave me a comment  :)

Wednesday 7 March 2012

Love Love Love

I wrote this tut on 6th of March,2012 for julies tutorials
Any resemblance to any other tutorials is purely coincidental.

Supplies needed

You also need paint shop pro,I use version 12
A knowledge of paint shop pro is needed

Other supplies needed

Scrap kit  Love Me Tender  by  AngelsDesignz
love love love template   by mythical designs
Tube of choice I'm using ISMAEL RAC
you need a license to use this work purchase from HERE
mask 221 used is by weescotslass creations
Font of your choice 

Lets begin


Open template,delete copyright info


activate each layer,using your magic wand click inside each part
and either choose a color or use a paper from the kit your using 


Select all,Copy and paste paper  7 into selection
Select none,Apply mask
Then Merge group.


go to layers and add a new raster layer and floodfill with write
and drag underneath the mask layer 


once you have completed each layer to your liking add some elements from the kit


Copy and paste any elements of your choice or use the ones that i did
And please see my tag for placement of elements

I used these's elements as follows:

Balloons
Bow2
CandyHeart
Charm
FeatherFan
HeartDoodle
HeartString
Lights
Lips
Roses
Sparkle2
Wordart1


Copy and paste a tube of your choice
 And resize if needed.


Choose 2 colors to write out your name with a font
Of your choice.


Add any copyrights and watermarks,Merge all layers visible


resize your tag if needed,I always Resize mine to 500 pixels


Go to file>export and save as JPEG or png


Thanks for trying out my tut ,hope you enjoyed it,if you have
Any questions or comments please leave me a comment  :)

Sunday 4 March 2012

You Are Everything Too Me (F.T.U)

I Wrote This Tut On 4th  Of   March,2012 For Julies Tutorials
Any Resemblance To Any Other Tutorials Is Purely Coincidental.

Supplies needed

Paint shop pro,I use version 12,but any version is ok
A knowledge of paint shop pro is needed

Other supplies needed

Scrap kit  thats amore  used is A FREE KIT  by  Scraps by Randy's Sin
Tube of your choice I'm using a FREE tube  by  (c)Sheila Craig aka voodoo
she has some wonderful tubes and they are all free
Mask 38 used is by weescotslass creations


Font of your choice


Lets begin

go to selections>select all
Copy and paste a paper from your kit
right click your tag and copy>paste into selection>Select none

next,go to layers>load/save mask>load mask from disk,choose a mask
and apply it,then merge group


copy and paste heartframe3 as new layer and With the magic wand
click inside frame>go to selections>modify>expand by 5 click ok

Add new raster layer drag under frame.
Copy and paste a paper  into selection.
then Select none.


copy and paste a tube of your choice and resize if required


you can start to add the elements to your tag and resize if required and place anywhere
on your tag , i used the following


bear1
arrow5
bow1
brad3
cupid
rose3
wa6
clip2


if you have finished adding elements from your kit choose a color or paper
and add your text using a font of your choice

please make sure you add copyright of the tube artist you used or if you used no tube
the scrapkit artists

once all done,merge your tag visible go to resize if you wish


go to file>export and save as a JPEG OR PNG


your all done ,i hope you enjoyed doing my tutorials always remember my tuts are
just a guard for you so have fun,thanks very much hugs from julie x

Friday 2 March 2012

Pink Sparkles

I Wrote This Tut On  27th  Of   february ,2012 For Julies Tutorials
Any Resemblance To Any Other Tutorials Is Purely Coincidental.

Supplies needed

You also need paint shop pro,I use version 12,but any version is ok
A knowledge of paint shop pro is needed

Other supplies needed

animation shop (for mask)
alienskin xenofex 2 constellation
lokas gel for text

Scrap kit  used 4ever  is  by   Chichi Designz
you can use a tube if you wish too i did not use one
mask 116  used is by weescotslass creations
Font of your choice.


Lets begin
Open a new 700x700 transparent image
Select all,Copy and paste paper   into selection
Select none,Apply mask
Then Merge group.


go to layers and add a new raster layer and floodfill with write
and drag underneath the mask layer


copy and paste Frame1 as new layer and
With the magic wand click inside frame.
Expand selection by 5


Add new raster layer under frame.
Copy and paste paper  into selection.
Select none.


copy and paste a tube of your choice and resize if required ,i did not use one

and then copy and paste the following elements from your kit and
arrange on your tag

WA2
Words
Balloon
Book
Bow1
Brush1
Brush2
Bubbles
Butterfliesglow
Cloud
FireFlies
Flower1
Flower
Flowers
Heart1
HeartBubbles
Ring


Add © info and name,Merge visible
And Resize as needed.


if you want to animate the mask follow me if not save your tag

activate your mask layer and dupicate twice so you have 3 layers

activate your first mask layer go to effects> xenofex 2 >constellation
using theses settings star size 2.55,size variation 83,edge star density 12
overall star density 0,overdrive 100,twinkle amount 75
twinkle rotation 45%,background fill keep original image checked ,press ok

close that layer

activate your second mask layer and copy the above step but press random seed once
press ok

close that layer and activate the 3rd layer and copy the above step

make sure the first mask layer is open close the other 2 layers

open animation shop >right click your tag >copy merged go into animation shop

go to edit>paste as a new animation

back into psp,close the 1st mask layer and open the 2nd>copy merged

back into animation shop>right click the tag and paste after the current frame

back into psp ,close the 2nd mask layer and open the 3rd one repeat the step above

you should now have 3 layers,next go to edit>select all >animation>resize animation to 500 pixels size

view your animation if ok go to file>saves as a gif

and thats it your all done


Thanks for trying my tutorial hope you enjoyed it :)