Monday 29 April 2013

Spring Has Sprung

I Wrote This Tut On 29th of   April, 2013 for Julies Tutorials
Any Resemblance To Any Other Tutorials Is Purely Coincidental.

Supplies needed

Paint shop pro, I use version x5, but any version is ok
A knowledge of paint shop pro is needed

Other supplies needed

Scrap kit used is sweet life by  Chichi Designz
Tube of your choice I'm using a tube by   Ismael Rac
You need a license to use his work purchase from HERE
Mask 246 used is by weescotslass creations


Font of your choice


Let’s begin

Go to selections>select all
Copy and paste  paper 1 from your kit
Right click your tag and copy>paste into selection>Select none

Next, go to layers>load/save mask>load mask from disk, choose a mask
And apply it, then merge group


Copy and paste Frame2 as new layer and with the magic wand
Click inside frame>go to selections>modify>expand by 5 click ok

Add new raster layer drag under frame.
Copy and paste paper 10  into selection.
Then Select none.


Copy and paste a tube of your choice and resize if required


You can start to add the elements to your tag and resize if required and place anywhere
On your tag, I used the following

Bird.png
Balloons.png
Balls.png
Birdcage.png
Bow2.png
BowRibbon.png
Brush.png
BubbleTrail.png
Butterflies.png
Clouds.png
DandelionSeeds.png
Doodle.png
Dragonfly.png
Feather.png
Flower2.png
Flower3.png
Flowers4.png
FlowerTrail.png
Grass2.png
Sparkles2.png
Tree2.png


If you have finished adding elements from your kit choose a colour or paper
And add your text using a font of your choice

Please make sure you add copyright of the tube artist you used or if you used no tube
The scrap kit artists

Once all done, merge your tag visible go to resize if you wish


Go to file>export and save as a JPEG OR PNG


You’re all done, I hope you enjoyed doing my tutorials always remember my tuts are
Just a guard for you so have fun, thanks very much hugs from Julie x

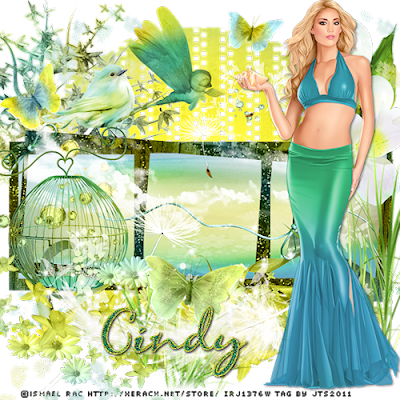


Shades Of Spring

I Wrote This Tut On 29th of  April, 2013 for Julies Tutorials
Any Resemblance To Any Other Tutorials Is Purely Coincidental.

Supplies needed

Paint shop pro, I use version x5, but any version is ok
A knowledge of paint shop pro is needed

Other supplies needed

Scrap kit used is visions of spring by  creative scraps by cry's
Tube of your choice I'm using a tube by   Very Many
You need a license to use this work purchase from HERE
Mask 245 used is by weescotslass creations


Font of your choice


Let’s begin

Go to selections>select all
Copy and paste  paper 7 from your kit
Right click your tag and copy>paste into selection>Select none

Next, go to layers>load/save mask>load mask from disk, choose a mask
And apply it, then merge group


Copy and paste Frame_4 as new layer and with the magic wand
Click inside frame>go to selections>modify>expand by 5 click ok

Add new raster layer drag under frame.
Copy and paste paper 12  into selection.
Then Select none.


Copy and paste a tube of your choice and resize if required


You can start to add the elements to your tag and resize if required and place anywhere
On your tag, I used the following
VOS_Element_1.png
VOS_Element_2.png
VOS_Element_10.png
VOS_Element_6.png
VOS_Element_13.png
VOS_Element_14.png
VOS_Element_16.png
VOS_Element_20.png
VOS_Element_26.png
VOS_Element_21.png
VOS_Element_27.png
VOS_Element_32.png
VOS_Element_43.png
VOS_Element_56.png
VOS_Element_49.png


If you have finished adding elements from your kit choose a colour or paper
And add your text using a font of your choice

Please make sure you add copyright of the tube artist you used or if you used no tube
The scrap kit artists

Once all done, merge your tag visible go to resize if you wish


Go to file>export and save as a JPEG OR PNG


You’re all done, I hope you enjoyed doing my tutorials always remember my tuts are
Just a guard for you so have fun, thanks very much hugs from Julie x


Saturday 27 April 2013

Dark Angel

I Wrote This Tut On 27th of  April, 2013 for Julies Tutorials
Any Resemblance To Any Other Tutorials Is Purely Coincidental.

Supplies needed

Paint shop pro, I use version x5, but any version is ok
A knowledge of paint shop pro is needed

Other supplies needed

Scrap kit used is Gothic Rose by  Carolyns  Scrap Creations
Tube of your choice I'm using a tube by   Alex_Prihodko
You need a license to use his work purchase from HERE
Mask 246  used is by weescotslass creations
http://weescotslasscreations.blogspot.com/

Font of your choice


Let’s begin

Go to selections>select all
Copy and paste a paper from your kit,i used  7 resize paper 80% 4 times
Right click your tag and copy>paste into selection>Select none

Next, go to layers>load/save mask>load mask from disk, choose a mask
And apply it, then merge group


Copy and paste frame 3 as new layer and with the magic wand
Click inside frame>go to selections>modify>expand by 5 click ok

Add new raster layer drag under frame.
Copy and paste paper 12 into selection
Then Select none.


Copy and paste a tube of your choice and resize if required


You can start to add the elements to your tag and resize if required and place anywhere
On your tag, I used the following


black feather.png resize to 25%
heart with wings copy.png  resize to 30%
 jewelery heart black.png resize to 45%
 jewelery heart.png resize to 45%
 moon.png resize to 15%
 Sparkles.png
 swirl 2.png   resize to 30%
 tree and raven.png resize to 40%
 Cross.png resize to 30% x2
 black ribbon.png resize to 30%
 black tear drops 1 .png  resize to 40%
 gothic black rose.png resize to 50%


If you have finished adding elements from your kit choose a colour or paper
And add your text using a font of your choice

Please make sure you add copyright of the tube artist you used or if you used no tube
The scrap kit artists

Once all done, merge your tag visible go to resize if you wish


Go to file>export and save as a JPEG OR PNG


You’re all done, I hope you enjoyed doing my tutorials always remember my tuts are
Just a guard for you so have fun, thanks very much hugs from Julie x

this one is using the same amazing kit gothic rose as above as you can see how different 2 tags can be


Friday 26 April 2013

Love Is In The Air

I Wrote This Tut On 26th of  April, 2013 for Julies Tutorials
Any Resemblance To Any Other Tutorials Is Purely Coincidental.

Supplies needed

Paint shop pro, I use version x5, but any version is ok
A knowledge of paint shop pro is needed

Other supplies needed

Scrap kit used is Summer Love by  Randy's Sin
Tube of your choice I'm using a tube by   Ismael Rac
You need a license to use his work purchase from HERE
Mask  241 used is by weescotslass creations


Font of your choice


Let’s begin

Go to selections>select all
Copy and paste  paper 8  from your kit
Right click your tag and copy>paste into selection>Select none

Next, go to layers>load/save mask>load mask from disk, choose a mask
And apply it, then merge group


Copy and paste fenceframe1 as new layer and with the magic wand
Click inside frame>go to selections>modify>expand by 5 click ok

Add new raster layer drag under frame.
Copy and paste paper 5 into selection.
Then Select none.


Copy and paste a tube of your choice and resize if required


You can start to add the elements to your tag and resize if required and place anywhere
On your tag, I used the following

rs_wa2.png
rs_aster3.png
rs_aster1.png
rs_bee3.png
rs_bee1.png
rs_bow2.png
rs_clouds1.png
rs_butterflynet1.png
rs_drops1.png
rs_flower1.png
rs_flower2.png
rs_gardengnome2.png
rs_grass3.png
rs_honey2.png
rs_aster5.png
rs_beads1.png
rs_scatterz1.png
rs_sparkles1.png
rs_wa4.png


If you have finished adding elements from your kit choose a colour or paper
And add your text using a font of your choice

Please make sure you add copyright of the tube artist you used or if you used no tube
The scrap kit artists

Once all done, merge your tag visible go to resize if you wish


Go to file>export and save as a JPEG OR PNG


You’re all done, I hope you enjoyed doing my tutorials always remember my tuts are
Just a guard for you so have fun, thanks very much hugs from Julie x


Be My Honey


I Wrote This Tut On 26th of  April, 2013 for Julies Tutorials
Any Resemblance To Any Other Tutorials Is Purely Coincidental.

Supplies needed

Paint shop pro, I use version x5, but any version is ok
A knowledge of paint shop pro is needed

Other supplies needed

Scrap kit used is honey to the bee by  Designs by stina
Tube of your choice I'm using a tube by  elias chatzoudis
this is a freebie you can find it at his store
You need a license to use his work purchase from HERE
Mask 241 used is by weescotslass creations
http://weescotslasscreations.blogspot.com/

Font of your choice


Let’s begin

Go to selections>select all
Copy and paste  paper 8 from your kit
Right click your tag and copy>paste into selection>Select none

Next, go to layers>load/save mask>load mask from disk, choose a mask
And apply it, then merge group


Copy and paste Frame04 as new layer and with the magic wand
Click inside frame>go to selections>modify>expand by 5 click ok

Add new raster layer drag under frame.
Copy and paste paper 13 into selection.
Then Select none.


Copy and paste a tube of your choice and resize if required


You can start to add the elements to your tag and resize if required and place anywhere
On your tag, I used the following

DBS_WordArt01.png
DBS_WordArt06.png
DBS_Bee01.png
DBS_Wire01.png
DBS_Umbrella.png
DBS_Honeypot01.png
DBS_HoneyDripper.png
DBS_Honey.png
DBS_Grass.png
DBS_Gardenia02.png
DBS_Butterflies.png
DBS_Doodle02.png
DBS_DoodleCloud02.png
DBS_Bunny.png
DBS_Floral01.png
DBS_Doodle03.png


If you have finished adding elements from your kit choose a colour or paper
And add your text using a font of your choice

Please make sure you add copyright of the tube artist you used or if you used no tube
The scrap kit artists

Once all done, merge your tag visible go to resize if you wish


Go to file>export and save as a JPEG OR PNG


You’re all done, I hope you enjoyed doing my tutorials always remember my tuts are
Just a guard for you so have fun, thanks very much hugs from Julie x


Pretty In Pink

I Wrote This Tut On 25th of  April, 2013 for Julies Tutorials
Any Resemblance To Any Other Tutorials Is Purely Coincidental.

Supplies needed

Paint shop pro, I use version x5, but any version is ok
A knowledge of paint shop pro is needed

Other supplies needed

Scrap kit used Love and its by  WackyWinnie Designz
Tube of your choice I'm using a tube by   Very Many
You need a license to use his work purchase from HERE
Mask 218 used is by weescotslass creations

Font of your choice


Let’s begin

Go to selections>select all
Copy and paste a paper from your kit ,i used paper 23
Right click your tag and copy>paste into selection>Select none

Next, go to layers>load/save mask>load mask from disk, choose a mask
And apply it, then merge group


Copy and paste Frame1 as new layer and with the magic wand
Click inside frame>go to selections>modify>expand by 5 click ok

Add new raster layer drag under frame.
Copy and paste paper 8 into selection.
Then Select none.


Copy and paste a tube of your choice and resize if required


You can start to add the elements to your tag and resize if required and place anywhere
On your tag, I used the following

Bag2
Bougainville2
Bougainville1
Bow1
CallaLilies3
Candy1
Envelope1
FHeart1
Flower4
HButton3
HString1


If you have finished adding elements from your kit choose a colour or paper
And add your text using a font of your choice

Please make sure you add copyright of the tube artist you used or if you used no tube
The scrap kit artists


Once all done, merge your tag visible go to resize if you wish


Go to file>export and save as a JPEG OR PNG


You’re all done, I hope you enjoyed doing my tutorials always remember my tuts are
Just a guard for you so have fun, thanks very much hugs from Julie x


Tuesday 23 April 2013

Chicks rule

I Wrote This Tut On 20th of  April , 2013 for Julies Tutorials
Any Resemblance To Any Other Tutorials Is Purely Coincidental.

Supplies needed

Paint shop pro, I use version x5, but any version is ok
A knowledge of paint shop pro is needed

Other supplies needed

Scrap kit used is by   Randy's Sin
Tube of your choice I'm using a tube by   Lady mishka
You need a license to use his work purchase from HERE
Mask 39 used is by weescotslass creations

Font of your choice


Let’s begin

Go to selections>select all
Copy and paste paper 1  from your kit
Right click your tag and copy>paste into selection>Select none

Next, go to layers>load/save mask>load mask from disk, choose a mask
And apply it, then merge group


Copy and paste frames1  as new layer and with the magic wand
Click inside frame>go to selections>modify>expand by 5 click ok

Add new raster layer drag under frame.
Copy and paste paper2  into selection.
Then Select none.


Copy and paste a tube of your choice and resize if required


You can start to add the elements to your tag and resize if required and place anywhere
On your tag, I used the following

wa4,
bokeh1
bokeh2
bow3
broken1
crocus1
doodle1
flowers3
chick1
scatterz1
ribbon1
petals1
lily1
jellybean4
grass2
leaves1


If you have finished adding elements from your kit choose a colour or paper
And add your text using a font of your choice

Please make sure you add copyright of the tube artist you used or if you used no tube
The scrap kit artists

Once all done, merge your tag visible go to resize if you wish


Go to file>export and save as a JPEG OR PNG


You’re all done, I hope you enjoyed doing my tutorials always remember my tuts are
Just a guard for you so have fun, thanks very much hugs from Julie x


I'm Addicted To You

I wrote this tut on 23rd of April, 2013 for Julie’s tutorials
Any resemblance to any other tutorials is purely coincidental.

Supplies needed

You also need paint shop pro, I use version x5, but any version will be ok
A knowledge of paint shop pro is needed


Other supplies needed

Scrap kit of your choice: I used a lovely kit called Addicted to Rac by  Crazeds Creations
you can buy this kit from Here


Template of your choice: I used one by Dee called Addicted to rac , you can download from her blog
http://deessigndepot.blogspot.com/

Tube of choice: I'm using a gorgeous tube by Ismael Rac
You need a license to use this work purchase from HERE


mask of your choice:mask 228 by weescotslass creations


Font of your choice.  VNI-Helvetica-Compressed size 90

Let’s begin


Open template, delete copyright info


Activate one of layers i kept to the colour , using your magic wand click inside  and copy and paste a paper  into selection, repeat with the other layers


Copy and paste any elements of your choice or use the ones that I did
And please see my tag for placement of elements

I used theses’ elements as follows:


Copy and paste stars4
stars3
starchain1
starchain2
skull4
musicnotes
musicnote1
flower3
flower4
bow6
charm2
doodle1
doodle4
guitar1


Copy and paste a tube of your choice


Choose 2 colours to write out your name with a font
Of your choice.


Add any copyrights and watermarks, Merge all layers visible


Resize your tag if needed, I always Resize mine to 500 pixels


Go to file>export and save as JPEG or png


Thanks for trying out my tut, hope you enjoyed it, if you have
Any questions or comments please leave me a comment :)

Tuesday 16 April 2013

Sexy Chick

I wrote this tut on 16th of April, 2013 for Julie’s tutorials
Any resemblance to any other tutorials is purely coincidental.

Supplies needed

You also need paint shop pro, I use version x5, but any version will be ok
A knowledge of paint shop pro is needed


Scrap kit of your choice: I used a lovely kit called Hot Chick by Cindy's Creative Design
you can buy this kit from Here


Template of your choice: I used one by Flaminsal , you can download from
http://firedbyflamin.blogspot.co.uk/
Tube of choice: I'm using a gorgeous tube by Alex prihodko
You need a license to use this work purchase from HERE

Mask of your choice:Mask 228  used is by weescotslass creations


Font of your choice. 

Let’s begin


Open template, delete copyright info


Activate the large circle , using your magic wand click inside   and copy and paste paper 15 into selection


activate circle 1 and copy and paste paper 5 do the same for circle 2


next activate your lge blk rect ,copy and paste  paper 4 into selection


use whatever paper you will like and do the same with the resy of the layers


Copy and paste any elements of your choice or use the ones that I did
And please see my tag for placement of elements

I used theses’ elements as follows:


Copy and paste  bow1 as a new layer and resize to 50%
Copy and paste  bow3   as a new layer andresize to 35%
Copy and paste  button3 as a new layer and resize to 30%
Copy and paste  corset3 as a new layer and resize to 30%
Copy and paste  cross1 as a new layer and resize to 50% 
Copy and paste  flowers2 as a new layer and resize to 40%
Copy and paste  flowers4 as a new layer and resize to 70%
Copy and paste  lips1 as a new layer and  resize to 30%
Copy and paste  lipstick2 as a new layer and  resize to 30%
copy and paste  butterfly1 as a new layer and  resize to 40%
copy and paste  flowers1 as a new layer and  resize to 40%
copy and paste hearts3 as a new layer and  resize to 50%
copy and paste  love1 as a new layer and  resize to 40%
copy and paste  ribbon2 as a new layer and  resize to 50%


Copy and paste a tube of your choice


Choose 2 colours to write out your name with a font
Of your choice.


Add any copyrights and watermarks, Merge all layers visible


Resize your tag if needed, I always Resize mine to 500 pixels


Go to file>export and save as JPEG or png


Thanks for trying out my tut, hope you enjoyed it, if you have
Any questions or comments please leave me a comment :)

Saturday 6 April 2013

Little Devil Of Rock

I Wrote This Tut On 6th of April, 2013 for Julies Tutorials
Any Resemblance To Any Other Tutorials Is Purely Coincidental.

Supplies needed

You also need paint shop pro, I use version x5, but any version is ok
A knowledge of paint shop pro is needed

Other supplies needed

Scrap kit used is part of brill collab Rawkin Emo and it is  by  Evol angel scrapz
tube of your choice :I Used one which comes with the kit
mask 36  used is by Weescotslass creations 
Font of your choice


Let’s begin
Open a new 700x700 transparent image
Select all, Copy and paste paper 1 into selection

Go to selections>select all
Copy and paste the paper from your kit
Right click your tag and copy>paste into selection>Select none

Next, go to layers>load/save mask>load mask from disk, choose a mask
And apply it, then merge group


Copy and paste Frame1 as new layer and
With the magic wand click inside frame.
Expand selection by 5


Add new raster layer under frame.
Copy and paste paper 13 into selection.
Select none.


Copy and paste a tube of your choice and resize if required

And then copy and paste the following elements from your kit and
Arrange on your tag

EAS_Border.png duplicate mirror flip
EAS_Bow1.png
EAS_BonesLollipop.png
EAS_CoolDevil.png
EAS_Cord.png
EAS_Headphones.png"
EAS_Guitar.png"
EAS_Lips.png
EAS_MiniIpod.png
EAS_MusicNote.png duplicate a few times
EAS_Speakers.png
EAS_Record.png
EAS_Wordart1.png
EAS_StagePass.png


Add © info and name, Merge visible
And Resize as needed.

Thanks for trying my tutorial hope you enjoyed it :)

this tag below is from the other part of the collab,sorry no tut for this one,thanks :)


L.O.V.E


I Wrote This Tut On the 5TH Of   April, 2013 for Julies Tutorials

Any Resemblance To Any Other Tutorials Is Purely Coincidental.


Supplies needed


Paint shop pro use version x5, but any version is ok 

A knowledge of paint shop pro is needed


Other supplies needed


Tube of choice: I used the artwork of   Ismael Rac

You must not use use the same tube as me unless you have a licence to do so

You may purchase the tube and license from HERE

Scrap Kit:  I used a beautiful kit love you beary much by Bubble's Dream

You can find the kit HERE

Mask of choice: I Used mask 39 which is by Weescotslass Creations 

Font of your choice


1) Open a blank canvas 800x800 we can resize later 

C/p paper 17 as a new layer 


2) Next, go to layers>load/save mask>load mask from disk, choose a mask 

And apply it, then merge group


3) Copy and paste Element01 as new layer and with the magic wand 

Click inside frame>go to selections>modify>expand by 5 click ok


4) Add a new raster layer drag under your frame.

And Copy and paste paper 18 into selection.

Then Select none.


5) Next copy and paste a tube of your choice and resize if needed 


6) Copy and paste Element02 as a new layer 

7) Copy and paste Element07 as a new layer 

8) Copy and paste Element40.png as a new layer 

C/p the following elements along with any other you wish to add

See my tag for placement 

Element09

Element11

Element15

Element17

Element21

Element30.

Element09. Duplicate

Element39. 


15) Next add your name, any other text and copyright info 


16) Once all done, merge your tag visible go and resize if you wish 


17) Go to file>export and save as a JPEG OR PNG 


your all done ,I hope you enjoyed doing my tutorials and found it easy to follow if not please let 


Monday 1 April 2013

Dark Angel

I Wrote This Tut On 1ST  Of April ,2013 For Julies Tutorials
Any Resemblance To Any Other Tutorials Is Purely Coincidental.

Supplies needed

You also need paint shop pro,I use version x5,but any version is ok
A knowledge of paint shop pro is needed

Other supplies needed

Scrap kit  used   is Dark Love  by Chichi Designz
tube of your choice;I'm using a tube by Alex Prihodko
you can buy his amazing work HERE
mask 241 used is by weescotslass creations
Font of your choice


Lets begin
Open a new 700x700 transparent image
Select all,Copy and paste paper 7 into selection

go to selections>select all
Copy and paste the  paper from your kit
right click your tag and copy>paste into selection>Select none

next,go to layers>load/save mask>load mask from disk,choose a mask
and apply it,then merge group


copy and paste Frame3  as new layer and
With the magic wand click inside frame.
Expand selection by 5


Add new raster layer under frame.
Copy and paste paper 4  into selection.
Select none.


copy and paste a tube of your choice and resize if required

and then copy and paste the following elements from your kit and
arrange on your tag

BloodSplatter
BloodSplatter2
BloodyHandBrush
BloodyNoose
Bow2
Bush
Cloud
CornerGrid
Cross
Flower1
Fog
Grass
Moon
Rose
Web2
WordArt


Add © info and name,Merge visible
And Resize as needed

save as a JPEG or PNG

Thanks for trying my tutorial hope you enjoyed it :)


easter chicks

I Wrote This Tut On 1st  Of April,2013 For Julies Tutorials
Any Resemblance To Any Other Tutorials Is Purely Coincidental.

Supplies needed

You also need paint shop pro,I use version x5,but any version is ok
A knowledge of paint shop pro is needed

Other supplies needed

Scrap kit  used peeps and quacks  is  by BLT designz
tube of your choice :i used the gorgeous artwork of rachel anderson
i brought this tube from a now closed store,you can find her art HERE
mask 249 used is by weescotslass creations
Font of your choice ,I Used Easter Parade


Lets begin
Open a new 700x700 transparent image
Select all,Copy and paste paper 13  into selection


go to selections>select all
Copy and paste the  paper from your kit
right click your tag and copy>paste into selection>Select none

next,go to layers>load/save mask>load mask from disk,choose a mask
and apply it,then merge group


copy and paste Frame1 as new layer and
With the magic wand click inside frame.
Expand selection by 5


Add new raster layer under frame.
Copy and paste paper  4 into selection.
Select none.


copy and paste a tube of your choice and resize if required

and then copy and paste the following elements from your kit and
arrange on your tag
Banner.png
Balloon.png
Bow1.png
Branch.png
Chick1.png
Duck.png
Doodle.png
Ducks.png
Flower2.png
Sparkles.png
Sun.png
Bead.png


Add © info and name,Merge visible
And Resize as needed.

save as  JPEG or PNG

Thanks for trying my tutorial hope you enjoyed it :)