Friday 30 December 2011

Blingn


I wrote this tut on 29th  of December,2011 for julies tutorials
Any resemblance to any other tutorials is purely coincidental.

Supplies needed

You also need paint shop pro,I use version 12
A knowledge of paint shop pro is needed

Other supplies needed

Scrap kit  A christmas carol by designed by stina
template by DEE
Tube of choice I'm using Posers by Meine Bastelwelt
mask 3 used is by weescotslass creations
Font of your choice 

Lets begin


Open template,delete copyright info

activate each layer,using your magic wand click inside each part
and either choose a color or use a paper from the kit your using 


Select all,Copy and paste paper 1  into selection
Select none,Apply mask
Then Merge group.


go to layers and add a new raster layer and floodfill with write
and drag underneath the mask layer 


once you have completed each layer to your liking at some elements from the kit


Copy and paste any elements of your choice or use the ones that i did
And please see my tag for placement of elements

I used these's elements as follows:

Bauble01 and resize to 10%
Bells01 and resize to 10%
Bird_on_Branch and resize to 10%
Bell02 and resize to 10%
Holly01 and resize to 10%
JingleBell04 and resize to 10%
Snowflakes
Stars
Gifts01
PineCones01


Copy and paste a tube of your choice or use one of the cookies
that come with the kit And resize if needed,i resized mine to 400 pixels


Choose 2 colors to write out your name with a font
Of your choice.


Add any copyrights and watermarks,Merge all layers visible


resize your tag if needed,I always Resize mine to 500 pixels


Go to file>export and save as JPEG or png


Thanks for trying out my tut ,hope you enjoyed it,if you have
Any questions or comments please leave me a comment  :)
 

Monday 19 December 2011

Christmas Down Under

I wrote this tut on 19th  of December,2011 for julies tutorials
Any resemblance to any other tutorials is purely coincidental.

Supplies needed

You also need paint shop pro,I use version 12
A knowledge of paint shop pro is needed

Other supplies needed

Scrap kit  Christmas around the world (australia)  by  http://tootypupscraps.blogspot.com
template   by Dee  http://deessigndepot.blogspot.com/
Font of your choice 

Lets begin


Open template,delete copyright info

activate each layer,using your magic wand click inside each part
and either choose a color or use a paper from the kit your using 


once you have completed each layer to your liking at some elements from the kit


Copy and paste any elements of your choice or use the ones that i did
And please see my tag for placement of elements

I used these's elements as follows:

Bow_01  and resize to 20%
Bauble_04 and resize to 20%
WildFlowerSprig_01 and resize to 60%
Candle_02 and resize to 30%
ChristmasBucket_02  and resize to 30%
ChristmasButterfly_03  and resize to 30%
ChristmasDeco_01 and resize to 40%
ChristmasTree_03 and resize to 40%
Koala_04 and resize to 40%


Copy and paste a tube of your choice
 And resize if needed,i resized mine to 400 pixels


Choose 2 colors to write out your name with a font
Of your choice.


Add any copyrights and watermarks,Merge all layers visible


resize your tag if needed,I always Resize mine to 500 pixels


Go to file>export and save as JPEG or png


Thanks for trying out my tut ,hope you enjoyed it,if you have
Any questions or comments please leave me a comment  :)
 

I Believe

I wrote this tut on 17TH  of DECEMBER,2011 for julies tutorials
Any resemblance to any other tutorials is purely coincidental.

Supplies needed

You also need paint shop pro,I use version 12
A knowledge of paint shop pro is needed

Other supplies needed

Scrap kit  FROST BERRY   by Angelsdesignz
template   by DEE
Tube of choice I'm using Ismael Rac
you need a license to use this work purchase from HERE
mask 116 used is by weescotslass creations
Font of your choice 

Lets begin


Open template,delete copyright info

activate each layer,using your magic wand click inside each part
and either choose a color or use a paper from the kit your using 


Select all,Copy and paste paper 1  into selection
Select none,Apply mask
Then Merge group.


go to layers and add a new raster layer and floodfill with write
and drag underneath the mask layer 


once you have completed each layer to your liking at some elements from the kit


Copy and paste any elements of your choice or use the ones that i did
And please see my tag for placement of elements

I used these's elements as follows:

Bauble  and resize to 70%
BeadedString  and resize to 80%
Bells
Branch  and resize to 70%
Candy1 and resize to 80%
Candle and resize to 60%
Charm and resize to 60%
HeartString
Lights
Scatter duplicate go to image and mirror >flip
snow
Snowflake2 and resize to 60%


Copy and paste a tube of your choice or use one of the cookies
that come with the kit And resize if needed,i resized mine to 400 pixels


Choose 2 colors to write out your name with a font
Of your choice.


Add any copyrights and watermarks,Merge all layers visible


resize your tag if needed,I always Resize mine to 500 pixels


Go to file>export and save as JPEG or png


Thanks for trying out my tut ,hope you enjoyed it,if you have
Any questions or comments please leave me a comment  :)
 

Let It Snow

I wrote this tut on 17th  of December,2011 for julies tutorials
Any resemblance to any other tutorials is purely coincidental.

Supplies needed

You also need paint shop pro,I use version x4,you can use any version
A knowledge of paint shop pro is needed

Other supplies needed

Scrap kit  santa express  by  Angelsdesignz
template   by Kandi kissez
Tube of choice I'm using is by Elias chatzoudis
,Do not use unless you have a proper license to do so
You can buy his work @ http://psptubesemporium.com/elias-chatzoudis/
Font of your choice,i used bridgnorth  


Lets begin


Open template,delete copyright info

activate each layer,using your magic wand click inside each part
and either choose a color or use a paper from the kit your using 

Add a mask if you wish


once you have completed each layer to your liking at some elements from the kit


Copy and paste any elements of your choice or use the ones that i did
And please see my tag for placement of elements

I used these's elements as follows:

Bells and resize to 40%

Bauble1 and resize to 60%

Mistletoe and resize to 40%

train

CandyCane  and resize to 40%

CupcakeTree  and resize to 40%

Lights

snow

Stocking and resize to 40%

HangingBaubles


Copy and paste a tube of your choice
And resize if needed,i resized mine to 400 pixels


Choose 2 colors to write out your name with a font
Of your choice.


Add any copyrights and watermarks,Merge all layers visible


resize your tag if needed,I always Resize mine to 500 pixels


Go to file>export and save as JPEG or png


Thanks for trying out my tut ,hope you enjoyed it,if you have
Any questions or comments please leave me a comment  :)
 

Saturday 17 December 2011

Be Breast Aware

I Wrote This Tut On 10th  Of  December ,2011 For Julies Tutorials
Any Resemblance To Any Other Tutorials Is Purely Coincidental.

Supplies needed

You also need paint shop pro,I use version 12,but any version is ok
A knowledge of paint shop pro is needed

Other supplies needed

Scrap kit  used   is positively pink  by http://angelsdesignz.blogspot.com
tube of your choice i'm using a  BCA freebie tube  by  Ismael Rac
you still need a license to use this work purchase from HERE
mask 56  used is by weescotslass creations
Font of your choice


Lets begin
Open a new 700x700 transparent image
Select all,Copy and paste paper 6  into selection
Select none,Apply mask
Then Merge group.


go to layers and add a new raster layer and floodfill with write
and drag underneath the mask layer


copy and paste Frame3  as new layer and
With the magic wand click inside frame.
Expand selection by 5


Add new raster layer under frame.
Copy and paste paper 2  into selection.
Select none.


copy and paste the following elements  as new layers and resize

AD_AngelRibbon.png  60%

AD_BCABear.png 50%

AD_Bow1.png  50%

AD_Charm.png 70%

AD_Butterfly2.png 60%

AD_Ele1.png duplcate mirror flip

AD_Jar.png 60%

AD_HeartSucker.png 70%

AD_Keychain.png 70%

mist

AD_Splat.png duplicate mirRor flip


copy and paste a tube of your choice and resize if required


Add © info and name,Merge visible
And Resize as needed.

Thanks for trying my tutorial hope you enjoyed it :)


Friday 16 December 2011

Marilyn

I Wrote This Tut On 12th  Of  December ,2011 For Julies Tutorials
Any Resemblance To Any Other Tutorials Is Purely Coincidental.
Supplies needed
You also need paint shop pro,I use version 12,but any version is ok
A knowledge of paint shop pro is needed
Other supplies needed
Scrap kit  used Fantasia  is  by  Chichi Designz
tube of your choice i'm using a tube  by  Ismael Rac
you need a license to use this work purchase from HERE
mask 116 used is by weescotslass creations
Font of your choice
 
Lets begin
Open a new 700x700 transparent image
Select all,Copy and paste paper 5  into selection
Select none,Apply mask
Then Merge group.
go to layers and add a new raster layer and floodfill with write
and drag underneath the mask layer
copy and paste Frame2 as new layer and
With the magic wand click inside frame.
Expand selection by 5
Add new raster layer under frame.
Copy and paste paper4  into selection.
Select none.
copy and paste the elements of your choice  as new layer's mine are below
Bow1_CD_Fantasia 50%
Bird_CD_Fantasia 50%
Branch_CD_Fantasia
Butterfly_CD_Fantasia 60%
ButterflyString_CD_Fantasia 70%
Cloud1_CD_Fantasia
DiamantRain_CD_Fantasia
Flower1_CD_Fantasia 60%
Flowers_CD_Fantasia 60%
Gem_CD_Fantasia 30%
Glitter_CD_Fantasia
Rainbow_CD_Fantasia
Sparkles1_CD_Fantasia
copy and paste a tube of your choice and resize if required
Add © info and name,Merge visible
And Resize as needed.
Thanks for trying my tutorial hope you enjoyed it :)

Our Island In Paradise

I Wrote This Tut On  12th Of  december  ,2011 For Julies Tutorials
Any Resemblance To Any Other Tutorials Is Purely Coincidental.

Supplies needed

You also need paint shop pro,I use version 12,but any version is ok
A knowledge of paint shop pro is needed

Other supplies needed

Scrap kit  used Isle Esme  is  by designed by stina
tube of your choice i'm using a  Poser by Medievil Creations
mask 81 used is by weescotslass creations
Font of your choice


Lets begin
Open a new 700x700 transparent image
Select all,Copy and paste Paper07  into selection
Select none,Apply mask
Then Merge group.


go to layers and add a new raster layer and floodfill with write
and drag underneath the mask layer


copy and paste Frame07 as new layer and
With the magic wand click inside frame.
Expand selection by 5


Add new raster layer under frame.
Copy and paste paper 11  into selection.
Select none.


copy and paste the following elements to your tag

DBS_Bow02 resize to 40%

DBS_BlueBottles  resize to 60%

DBS_Bubbles

DBS_Charm01  resize to 30%


DBS_Charm02 resize to 30%

DBS_Feathers resize to  80%

DBS_Hearts01

DBS_IslandRainbow

DBS_Moon  resize to 50%

DBS_Palm01  resize to 60%

DBS_Sparkles


copy and paste a tube of your choice and resize if required


Add © info and name with a font and colour of your choice,Merge visible
And Resize as needed.

Thanks for trying my tutorial hope you enjoyed it :)


Wednesday 23 November 2011

Comfort And Joy


I Wrote This Tut On 23rd Of  November ,2011 For Julies Tutorials
Any Resemblance To Any Other Tutorials Is Purely Coincidental.

Supplies needed

You also need paint shop pro,I use version 12,but any version is ok
A knowledge of paint shop pro is needed

Other supplies needed

Scrap kit  used   is christmas joy  by   Tootypup Scraps
tube of your choice i'm using a cookie by Elisa Design
mask 88 is by
http://weescotslasscreations.blogspot.com/
Font of your choice ,i used Rage Italic size 48


Lets begin
Open a new 700x700 transparent image
Select all,Copy and paste paper 11  into selection
Select none,Apply mask
Then Merge group.


go to layers and add a new raster layer and floodfill with write
and drag underneath the mask layer


copy and paste ClusterFrame_04 as new layer and
With the magic wand click inside frame.
Expand selection by 5


Add new raster layer under frame.
Copy and paste paper 4 into selection.
Select none.


copy and paste the following to your tag and resize as follows

Bell_03 resize to 20%

Bow_02  resize to 30%

ChristmasDeco_05 

ChristmasAroundTheWorld_07 

ChristmasNote_01  resize to 50%

Deco_02  resize to 60%

FlowerDecow_01

Holly_01  resize to 20%


copy and paste a tube of your choice and resize if required


Add © info and name,Merge visible
And Resize as needed.

Thanks for trying my tutorial hope you enjoyed it :)


Monday 21 November 2011

Twilight Love

I Wrote This Tut On 20th  Of  November,2011 For Julies Tutorials
Any Resemblance To Any Other Tutorials Is Purely Coincidental.

Supplies needed

You also need paint shop pro,I use version 12,but any version is ok
A knowledge of paint shop pro is needed

Other supplies needed

Scrap kit  used   is  Twilight Is Forever by designed by stina
tube of your choice i'm using a Poser by MediEvil Creations
mask 99 used is by weescotslass creations
Font of your choice ,i used Vladimir Script size 72


Lets begin
Open a new 700x700 transparent image
Select all,Copy and paste paper 3  into selection
Select none,Apply mask
Then Merge group.


copy and paste frame 4 as new layer and
With the magic wand click inside frame.
Expand selection by 5


Add new raster layer under frame.
Copy and paste paper 8 into selection.
Select none.


copy and paste Bow03 as new layer and place on the top of the frame.


copy and paste a tube of your choice and resize if required


copy and paste Butterfly03 as new layer,resize to 60%


copy and paste Candle04 as new layer,resize to 50%


copy and paste Crest02 as new layer,resize to 60%


copy and paste DiamondHeart as new layer,resize to 30%


copy and paste HeartCushions as new layer,resize to 50%


copy and paste  Hearts as new layer,duplicate
go to image>mirror>flip


copy and paste Leaves02 as new layer,resize to 70%


copy and paste Moon as new layer,resize to 50%


copy and paste Rose05 as new layer,resize to 70%


copy and paste sparkles and sprinkles2 as new layer


copy and paste WordArt as new layer,resize to 50%


Add © info and name,Merge visible
And Resize as needed,save as  JPEG OR PNG

Thanks for trying my tutorial hope you enjoyed it :)

Saturday 19 November 2011

Girl Power


I wrote this tut on 19th of November ,2011 for julies tutorials
Any resemblance to any other tutorials is purely coincidental.

Supplies needed

You also need paint shop pro,I use version 12
A knowledge of paint shop pro is needed

Other supplies needed
Scrap kit  is Free Friendship  by  Amy (aka ZiggyFan)
template   by creativebynature1 
Tube of choice I'm using Ismael Rac,Do not use unless you have a proper license to do so
You can buy his work @ his STORE
Font of your choice

Lets begin


Open template,delete copyright info

activate each layer,using your magic wand click inside each part
and either choose a color or use a paper from the kit your using


once you have completed each layer to your liking at some elements from the kit


Copy and paste any elements of your choice or use the ones that i did
And please see my tag for placement of elements

I used these's elements as follows:

Element1 and resize to 70%
Element11 and resize to 40%
Element13
Element8
Element19 and resize to 40%
Element16
Element28 and resize to 40%
Element 23
Element25


Copy and paste a tube of your choice or use one of the cookies
that come with the kit And resize if needed,i resized mine to 400 pixels

i used the selection tool click on your tube and select a part of your tube
press copy and paste as a new image then
copy and paste into the black square


Choose 2 colors to write out your name with a font
Of your choice.


Add any copyrights and watermarks,Merge all layers visible


resize your tag if needed,I always Resize mine to 500 pixels


Go to file>export and save as JPEG or png


Thanks for trying out my tut ,hope you enjoyed it,if you have
Any questions or comments please leave me a comment  :)

I'm In Heaven With You

I Wrote This Tut On 19th  Of  November ,2011 For Julies Tutorials
Any Resemblance To Any Other Tutorials Is Purely Coincidental.

Supplies needed

You also need paint shop pro,I use version 12,but any version is ok
A knowledge of paint shop pro is needed

Other supplies needed

Scrap kit  used   is IsleEsme by  Tootypup Scraps
poser is by medievil 
mask 345 used is by weescotslass creations
Font of your choice


Lets begin
Open a new 700x700 transparent image
Select all,Copy and paste paper  5 into selection
Select none,Apply mask
Then Merge group.


go to layers and add a new raster layer and floodfill with write
and drag underneath the mask layer


copy and paste TagFrame_02 as new layer and
With the magic wand click inside frame.
Expand selection by 5


Add new raster layer under frame.
Copy and paste paper 6 into selection.
Select none.


copy and paste the following elements as new layer's and resize
if needed

Moon_01  resize to 70%

EdwardBella_02 resize to 80%

Feather_03. resize to 60%

Feather_01. resize to 50%

Butterflys_04. resize to 70%

Bench_03. resize to 60%

Feather_04. resize to 80%

flower_04. resize to 20 %

flower_03. resize to 10%

FlowerDeco_002. resize to 80%

WillowTree_01. resize to 50%

Flamingo_01. resize to 20%

Wisteria_01. resize to 30%

Wisteria_03 resize to 40%


Add © info and name,Merge visible
And Resize as needed.

Thanks for trying my tutorial hope you enjoyed it :)

Thursday 17 November 2011

EMOtional wreck

I Wrote This Tut On 16th  Of   November,2011 For Julies Tutorials
Any Resemblance To Any Other Tutorials Is Purely Coincidental.

Supplies needed

You also need paint shop pro,I use version 12,but any version is ok
A knowledge of paint shop pro is needed

Other supplies needed

Scrap kit  used  is Emolution23 by   Angelsdesignz
tube of your choice i'm using a tube  by  Zlata_M ©
Exclusive www.PicsForDesign.com
mask 38 used is by weescotslass creations
Font of your choice


Lets begin
Open a new 700x700 transparent image
Select all,Copy and paste paper  8  into selection
Select none,Apply mask
Then Merge group.


go to layers and add a new raster layer and floodfill with write
and drag underneath the mask layer


copy and paste Frame3 as new layer and
With the magic wand click inside frame.
Expand selection by 5


Add new raster layer under frame.
Copy and paste paper 2 into selection.
Select none.


copy and paste  elements from the kit,i used as follows

Wire

Wordart

Teddy resize to 30%

Star2 resize to 40%

Star1 resiZe to   40%

Stars1

Splat duplicate mirror flip

sparkles 2

RazorBlade rEsize to 60%

NailPolish resize to  50%

Flame  duplicate

BarbwireHeart resize to 60%

NauticalStar  resize to 70%

GlitterDoodle


copy and paste a tube of your choice and resize if required


Add © info and name,Merge visible
And Resize as needed,save as a jpeg or png

Thanks for trying my tutorial hope you enjoyed it :)

Monday 14 November 2011

Winter wonderland

I Wrote This Tut On 14th  Of   November,2011 For Julies Tutorials
Any Resemblance To Any Other Tutorials Is Purely Coincidental.

Supplies needed

You also need paint shop pro,I use version 12,but any version is ok
A knowledge of paint shop pro is needed

Other supplies needed

Scrap kit  used   is Winter Blessing by  Chichi Designz  
tube of your choice i'm using a tube  by Keith Garvey
you need a license to use this work purchase from HERE
mask 221  used is by weescotslass creations
Font of your choice


Lets begin
Open a new 700x700 transparent image
Select all,Copy and paste paper 14  into selection
Select none,Apply mask
Then Merge group.


go to layers and add a new raster layer and floodfill with write
and drag underneath the mask layer


copy and paste Frame as new layer and
With the magic wand click inside frame.
Expand selection by 5


Add new raster layer under frame.
Copy and paste paper 3 into selection.
Select none.


copy and paste the following elements and resize if required

Baulbsand resize to  70%

Cloud1

Bow and resize to 50%

Tree1 and resize to 90%

Swirl1

SnowFlake and resize to 30%

Leaf and resize to  60%

Flowers and resize to 30%

leaves 1 and resize to 50%


look at my tag for placement


copy and paste a tube of your choice and resize if required


i also picked a colour from my tag for a background
then used mask 345

Add © info and name,Merge visible
And Resize as needed.save as a jpeg or png

Thanks for trying my tutorial hope you enjoyed it :)

This Love Is Forever

I wrote this tut on 14th of November,2011 for julies tutorials
Any resemblance to any other tutorials is purely coincidental.

Supplies needed

You also need paint shop pro,I use version 12
A knowledge of paint shop pro is needed

Other supplies needed

Scrap kit  Forever is only the beginning  by  designed by stina
template   by Mistressv 
Tube of choice i'm using medievilcreations
mask 221 used is by weescotslass creations
Font of your choice,i used Kunstler Script size 100

Lets begin


Open template,delete copyright info

activate each layer,using your magic wand click inside each part
and either choose a color or use a paper from the kit your using


Select all,Copy and paste paper 2  into selection
Select none,Apply mask
Then Merge group.


go to layers and add a new raster layer and floodfill with write
and drag underneath the mask layer


once you have completed each layer to your liking at some elements from the kit


Copy and paste any elements of your choice or use the ones that i did
And please see my tag for placement of elements

I used these's elements as follows:

GlitterHearts and resize to 80%

WeddingInvitation and resize to 50%

WeddingRings and resize to 30%

stinaweddingcouple2 and resize to 60%

WordArt04 and resize to 50%

SparkleRain

Rose02 and resize to 20%

Moon and resize to 40%

GemHeart02 and resize to 20%

MetallicFlute_etched01 and resize to 60%

DiamondHeart

Bling

HeartFrame01 resize to 10% and duplicate


Copy and paste a tube of your choice or use one of the cookies
that come with the kit And resize if needed,i resized mine to 400 pixels


Choose 2 colors to write out your name with a font
Of your choice.


Add any copyrights and watermarks,Merge all layers visible


resize your tag if needed,I always Resize mine to 500 pixels


Go to file>export and save as JPEG or png


Thanks for trying out my tut ,hope you enjoyed it,if you have
Any questions or comments please leave me a comment  :)

Sunday 6 November 2011

I Aint No Angel

I Wrote This Tut On 6th  Of   November ,2011 For Julies Tutorials
Any Resemblance To Any Other Tutorials Is Purely Coincidental.

Supplies needed

You also need paint shop pro,I use version 12,but any version is ok
A knowledge of paint shop pro is needed

Other supplies needed

Scrap kit  used   is Racs Angel by  Angels designz
tube of your choice i'm using a tube  by  Ismael Rac
you need a license to use this work purchase from HERE
mask 238 used is by weescotslass creations
Font of your choice ,i used VTCSuperMarketSaleSC size 36


Lets begin
Open a new 700x700 transparent image
Select all,Copy and paste paper 8  into selection
Select none,Apply mask
Then Merge group.


copy and paste Frame1 as new layer and
With the magic wand click inside frame.
Expand selection by 5


Add new raster layer under frame.
Copy and paste paper 1 into selection.
Select none.


copy and paste BeadSpray as new layer,move to the left dupilcate
then go image>mirror>flip,move the layer under the paper layer


copy and paste a tube of your choice and resize if required


copy and paste Barbwire Heart  as new layer,resize to 80%


copy and paste CrystalStar as new layer,resize to 50%


copy and paste Cupcake1 as new layer,resize to 60%


copy and paste ChromeDoodle as new layer


copy and paste Doodle as new layer,drag under the paper layer
dupilcate
then go image>mirror>flip,move the layer under the paper layer


copy and paste  HeartBead as new layer


copy and paste HeartSucker as new layer,resize to 80%


copy and paste Linked Hearts as new layer


copy and paste Splat1 as new layer,send to the bottom


copy and paste Splat2 as new layer,send to the bottom


I Also added Sparkles1 and Sparkles3

i also duplicated the mask layer and moved 1 to the left and the other
to the right


Add © info and name,Merge visible
And Resize as needed.

Thanks for trying my tutorial hope you enjoyed it :)


Truelove Is Forever


I Wrote This Tut On 6th  Of   November ,2011 For Julies Tutorials
Any Resemblance To Any Other Tutorials Is Purely Coincidental.

Supplies needed

You also need paint shop pro,I use version 12,but any version is ok
A knowledge of paint shop pro is needed

Other supplies needed

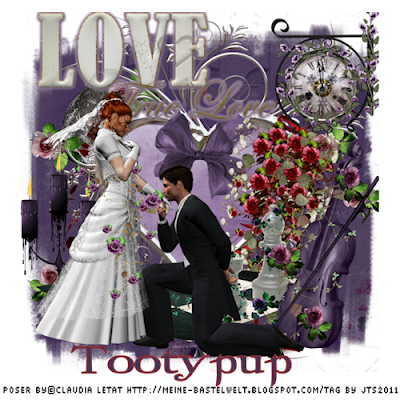
Scrap kit  used is Forever Is Only The Beginning  by   Tootypup Scraps
tube of your choice i'm using  Wedding Posers by ©Claudia Letat
mask 3 used is by weescotslass creations
Font of your choice ,i used Twilight size 50


Lets begin
Open a new 700x700 transparent image
Select all,Copy and paste paper 3  into selection
Select none,Apply mask
Then Merge group and duplicate mask layer


go to layers and add a new raster layer and floodfill with write
and drag underneath the mask layer


copy and paste HeartFramePlain_01 as new layer and
With the magic wand click inside frame.
Expand selection by 5


Add new raster layer under frame.
Copy and paste paper 7  into selection.
Select none.


copy and paste the following elements  as new layers and resize if required

Bow_03 and resize to 20%

BridalBouquet_01 and resize to 60%

ChessBoard_02 and resize to 70%

Candle_02 and resize to 60%

Clock_02 and resize to 30%

Moon_01 and resize to 40%

RoseVine_03 and resize to 70%

Violin_03  and resize to 60%

Wordart_01 and resize to 70%


copy and paste a tube of your choice and resize if required
I Used Wedding_01 that comes with the kit


Add © info and name,Merge visible
And Resize as needed.

Thanks for trying my tutorial hope you enjoyed it :)

Tuesday 1 November 2011

Our Wedding Day

I Wrote This Tut On 31st  Of  October ,2011 For Julies Tutorials
Any Resemblance To Any Other Tutorials Is Purely Coincidental.

Supplies needed

You also need paint shop pro,I use version 12,but any version is ok
A knowledge of paint shop pro is needed

Other supplies needed

Scrap kit  used Twilight Wedding   is  by Chichi Designz
tube of your choice i'm using a Free tube  by Zindy Nielson
you still need a license to use this work
mask 311 and 9  used is by weescotslass creations
Font of your choice ,i used twilght size 42


Lets begin
Open a new 700x700 transparent image
Select all,Copy and paste paper 14  into selection
Select none,Apply mask 311
Then Merge group.

repeat for other Mask

and i USed paper 9 for mask 3


go to layers and add a new raster layer and floodfill with write
and drag underneath the mask layer


copy and paste Frame3 as new layer and
With the magic wand click inside frame.
Expand selection by 6


Add new raster layer under frame.
Copy and paste paper 17 into selection.
Select none.


copy and paste  the following elements from the kit and other of your choice if you wish as new layer
and resize if required

Balloon

Clouds

Element


Dove resize to 60%

dust

FlowerFrame resize to 80%

FlowersBows  resize to 80%

Glitters

HeartCloud

KeyString

Moon

Rings  resize to 40%

ScatteredFlowers

ScatteredHearts


copy and paste a tube of your choice and resize if required


Add © info and name,Merge visible
And Resize as needed,save as a Jpg or Png

Thanks for trying my tutorial hope you enjoyed it :)


I'd Rather Be A Vamp

I wrote this tut on 31st of october ,2011 for julies tutorials
Any resemblance to any other tutorials is purely coincidental.

Supplies needed

You also need paint shop pro,I use version 12
A knowledge of paint shop pro is needed

Other supplies needed

Scrap kit  Goff  by  Pimpd Design
template   by cakes at crazycakesscraps.blogspot.com
Tube of choice I'm using Jose A cano,Do not use unless you have a proper license to do so
You can buy his work @ PSP TUBEs EMPORIuM
mask 363 used is by weescotslass creations
Font of your choice  I Used Vampiress size 120

Lets begin


Open template,delete copyright info

activate each layer,using your magic wand click inside each part
and either choose a color or use a paper from the kit your using 


Select all,Copy and paste paper 3  into selection
Select none,Apply mask
Then Merge group.


go to layers and add a new raster layer and floodfill with write
and drag underneath the mask layer 


once you have completed each layer to your liking at some elements from the kit


Copy and paste any elements of your choice or use the ones that i did
And please see my tag for placement of elements

I used these's elements as follows:

pd-hearts-01.png

pd-lips.png

pd-flower-01.png

pd-print-01.png

pd-star-01.png

pd-star-02.png

pd-frame-01.png

pd-doodle-01.png


Copy and paste a tube of your choice or use one of the cookies
that come with the kit And resize if needed,i resized mine to 400 pixels


Choose 2 colors to write out your name with a font
Of your choice.


Add any copyrights and watermarks,Merge all layers visible


resize your tag if needed,I always Resize mine to 500 pixels


Go to file>export and save as JPEG or png


Thanks for trying out my tut ,hope you enjoyed it,if you have
Any questions or comments please leave me a comment  :)
 

Autumn Leaves

I wrote this tut on 30th  of October,2011 for julies tutorials
Any resemblance to any other tutorials is purely coincidental.

Supplies needed

You also need paint shop pro,I use version 12
A knowledge of paint shop pro is needed

Other supplies needed

Scrap kit  Autumn Colours  by   diane of candytreat's
template   by creative by nature
Tube of choice I'm using Ismael Rac,Do not use unless you have a proper license to do so
You can buy his work @ his store
Font of your choice  i used victoriana size 36

Lets begin


Open template,delete copyright info

activate each layer,using your magic wand click inside each part
and either choose a color or use a paper from the kit your using


go to layers and add a new raster layer and floodfill with write
and drag underneath the mask layer


once you have completed each layer to your liking at some elements from the kit


Copy and paste any elements of your choice or use the ones that i did
And please see my tag for placement of elements

I used these's elements as follows:

AutumnStar3

Autumn-Bow3

Autumn-Butterfly1

Autumn-Cluster1

Autumn-Cones

Autumn-Lamp

Autumn-LeafyBackground

Autumn-Leaves2

Autumn-LeavesPile

Autumn-Ribbon5


Copy and paste a tube of your choice
And resize if needed,i resized mine to 400 pixels


Choose 2 colors to write out your name with a font
Of your choice.


Add any copyrights and watermarks,Merge all layers visible


resize your tag if needed,I always Resize mine to 500 pixels


Go to file>export and save as JPEG or png


Thanks for trying out my tut ,hope you enjoyed it,if you have
Any questions or comments please leave me a comment  :)
 

Boo 2 U


I wrote this tut on 30TH  of  October ,2011 for julies tutorials
Any resemblance to any other tutorials is purely coincidental.

Supplies needed

You also need paint shop pro,I use version 12
A knowledge of paint shop pro is needed

Other supplies needed

Scrap kit Chills and Thrills  by  Jens Sweet Temptations
cookie used is by  medievil creations http://medievilcreations.blogspot.com/
template   by DEE
mask 363  used is by weescotslass creations
Font of your choice

Lets begin


Open template,delete copyright info

activate each layer,using your magic wand click inside each part
and either choose a color or use a paper from the kit your using


Select all,Copy and paste paper   into selection
Select none,Apply mask
Then Merge group.


go to layers and add a new raster layer and floodfill with write
and drag underneath the mask layer


once you have completed each layer to your liking at some elements from the kit


Copy and paste any elements of your choice or use the ones that i did
And please see my tag for placement of elements

I used these's elements as follows:

Bat.png
Balloon1.png
Cat1.png
Glitter.png
Glitter1.png
Glitter2.png
Web.png
Moon1.png
Cat2.png


Copy and paste a tube of your choice or use one of the cookies
that come with the kit And resize if needed,i resized mine to 400 pixels


Choose 2 colors to write out your name with a font
Of your choice.


Add any copyrights and watermarks,Merge all layers visible


resize your tag if needed,I always Resize mine to 500 pixels


Go to file>export and save as JPEG or png


Thanks for trying out my tut ,hope you enjoyed it,if you have
Any questions or comments please leave me a comment  :)
 

Heaven Sent


I Wrote This Tut On 30th Of  october,2011 For Julies Tutorials
Any Resemblance To Any Other Tutorials Is Purely Coincidental.

Supplies needed

You also need paint shop pro,I use version 12,but any version is ok
A knowledge of paint shop pro is needed

Other supplies needed

Scrap kit  used is love letters from heaven by gina gems scraps
tube of your choice
mask 224 used is by weescotslass creations
Font of your choice ,i used Sachiko size 72


Lets begin
Open a new 700x700 transparent image
Select all,Copy and paste paper 2  into selection
Select none,Apply mask
Then Merge group.


go to layers and add a new raster layer and floodfill with write
and drag underneath the mask layer


copy and paste  as new layer and
With the magic wand click inside frame.
Expand selection by 5


Add new raster layer under frame.
Copy and paste paper 18 into selection.
Select none.


copy and paste Frame 5 as new layer and resize to 70%


copy and paste a tube of your choice and resize if required


copy and paste the following elements from the kit and any others that you wish to add


Beads Deco.png duplicate,mirror

Sparkle Swirl

Pretty Flower resize to 60%

Botanical Flower 2   resize to 80%

Decorative Bottle  resize to 50%

Envelope  resize to 50%

Flower Branch Wreathe

Flower Swirl 1

Ribbon 3  resize to 50%

Sparkles 1

Light Angel

Sparkles 2


Add © info and name,Merge visible
And Resize as needed,save as a Jpg or Png

Thanks for trying my tutorial hope you enjoyed it :)

Friday 21 October 2011

Daddy's gonna get ya :)


I Wrote This Tut On 21st  Of  october ,2011 For Julies Tutorials
Any Resemblance To Any Other Tutorials Is Purely Coincidental.

Supplies needed

You also need paint shop pro,I use version 12,but any version is ok
A knowledge of paint shop pro is needed

Other supplies needed

Scrap kit  used spooky sweet  is  by angel designz
tube of your choice i'm using a freebie tube  by  Ismael Rac
you need a license to use this work purchase from HERE
mask 232 used is by weescotslass creations
Font of your choice


Lets begin
Open a new 700x700 transparent image
Select all,Copy and paste paper  5  into selection
Select none,Apply mask
Then Merge group.


go to layers and add a new raster layer and floodfill with write
and drag underneath the mask layer


copy and paste Frame2 as new layer and
With the magic wand click inside frame.
Expand selection by 5


Add new raster layer under frame.
Copy and paste paper 8  into selection.
Select none.


copy and paste Web as new layer


copy and paste a tube of your choice and resize if required


copy and paste Cloud as new layer,duplicate then go to image
mirror then flip


copy and paste Bats as new layer.


copy and paste Bow1 as new layer,resize to 50%


copy and paste CandyCorn as new layer,resize to 50%


copy and paste CandyTwirl as new layer,resize to 60%


copy and paste Ghost  as new layer,resize to 70%


copy and paste Frankenstein as new layer,resize to 50%


copy and paste Tree as new layer


copy and paste Splat2 as new layer.


copy and paste Sparkles as new layer.


copy and paste Lolli as a new layer


copy and paste SpookySauce as a new layer


Add © info and name,Merge visible
And Resize as needed.

Thanks for trying my tutorial hope you enjoyed it :)

Trick or a treat


I Wrote This Tut On 20th  Of   October ,2011 For Julies Tutorials
Any Resemblance To Any Other Tutorials Is Purely Coincidental.

Supplies needed

You also need paint shop pro,I use version 12,but any version is ok
A knowledge of paint shop pro is needed

Other supplies needed

Scrap kit  used  Tricksys Treats  is  by designed by stina
Posers by MediEvil Creations
mask 238 used is by weescotslass creations
Font of your choice


Lets begin
Open a new 700x700 transparent image
Select all,Copy and paste paper  11  into selection
Select none,Apply mask
Then Merge group.


go to layers and add a new raster layer and floodfill with write
and drag underneath the mask layer


copy and paste Frame 1 as new layer and
With the magic wand click inside frame.
Expand selection by 5


Add new raster layer under frame.
Copy and paste paper 1 into selection.
Select none.


copy and paste Brooms as new layer,resize to 60%


copy and paste a tube of your choice and resize if required


copy and paste CandyApple02 as new layer,resize to 50%


copy and paste Candy01 as new layer,resize to 50%


copy and paste Ghost as new layer,resize to 40%


copy and paste SpideyWeb01 as new layer


copy and paste Spidey01 as new layer,resize to 50%


copy and paste  Cake Pumpkin as new layer,resize to 20%


copy and paste Candy07 as new layer,resize to 70%


copy and paste CandyCorn03 as new layer,resize to 20%


Add © info and name,Merge visible
And Resize as needed.

Thanks for trying my tutorial hope you enjoyed it :)

Sunday 9 October 2011

The Darkness

I Wrote This Tut On 4th  Of   October ,2011 For Julies Tutorials
Any Resemblance To Any Other Tutorials Is Purely Coincidental.

Supplies needed

You also need paint shop pro,I use version 12,but any version is ok
A knowledge of paint shop pro is needed

Other supplies needed

Scrap kit  used   is  by   My Dark Side
Pimpd Designz 
tube of your choice i'm using a tube  by Dark Yarrow
i brought this tube from mypsptubes
you need a license to use this work purchase from HERE
mask 5 used is by weescotslass creations
Font of your choice ,i used PopStar Autograph


Lets begin
Open a new 700x700 transparent image
Select all,Copy and paste paper 5  into selection
Select none,Apply mask
Then Merge group.


go to layers and add a new raster layer and floodfill with write
and drag underneath the mask layer


copy and paste frame-02 as new layer and resize to 80%
With the magic wand click inside frame.
Expand selection by 5


Add new raster layer under frame.
Copy and paste paper 1 into selection.
Select none.


copy and paste wire as new layer


copy and paste a tube of your choice and resize if required


copy and paste bracket-01as new layer,resize to %


copy and paste feather as new layer,resize to 70%


copy and paste flower-02 as new layer,resize to 60%


copy and paste leaf-01 as new layer,resize to 70%


copy and paste leaf-02 as new layer,resize to 60%


copy and paste key  as new layer,resize to60%


copy and paste moon as new layer,resize to 50%


copy and paste print-02 as new layer


copy and paste ribbon-02 as new layer


copy and paste sparkle-01 as new layer


copy and paste splatter-01 as a new layer


Add © info and name,Merge visible
And Resize as needed.

Thanks for trying my tutorial hope you enjoyed it :)

True Love


I Wrote This Tut On 5th  Of  October  ,2011 For Julies Tutorials

Any Resemblance To Any Other Tutorials Is Purely Coincidental.

Supplies needed

You also need paint shop pro,I use version 12,but any version is ok
A knowledge of paint shop pro is needed

Other supplies needed

Scrap kit  used  Love is Forever  is  free to use by Amy (aka ZiggyFan)
tube of your choice i'm using a tube  by  Ismael Rac
you need a license to use this work purchase from HERe
mask 238  used is by weescotslass creations
Font of your choice ,i used PopStar Autograph


Lets begin
Open a new 700x700 transparent image
Select all,Copy and paste paper 6  into selection
Select none,Apply mask
Then Merge group.


go to layers and add a new raster layer and floodfill with write
and drag underneath the mask layer


copy and paste Element5 as new layer and
With the magic wand click inside frame.
Expand selection by 5


Add new raster layer under frame.
Copy and paste paper 4 into selection.
Select none.


copy and paste Element4 as new layer


copy and paste a tube of your choice and resize if required


copy and paste  Element10 as new layer.


copy and paste Element11 as new layer,resize to 80%


copy and paste Element12 as new layer,resize to 80%


copy and paste Element18 as new layer,resize to 60%


copy and paste Element20 as new layer.


copy and paste  Element28 as new layer,resize to70%


copy and paste Element17 as new layer,resize to 70%


copy and paste Element1 as new layer,resize to 30%


Add © info and name,Merge visible
And Resize as needed.

Thanks for trying my tutorial hope you enjoyed it :)


Thursday 29 September 2011

Summer Lovin


I Wrote This Tut On 27th Of  September ,2011 For Julies Tutorials
Any Resemblance To Any Other Tutorials Is Purely Coincidental.

Supplies needed

You also need paint shop pro,I use version 12,but any version is ok
A knowledge of paint shop pro is needed

Other supplies needed

Scrap kit  used  Emo Station is  by   Jens Sweet Temptations
tube of your choice i'm using a tube  by  Ismael Rac
you need a license to use this work purchase from HERE
mask 302 used is by weescotslass creations
Font of your choice ,i used PopStar Autograph

Lets begin
Open a new 700x700 transparent image
Select all,Copy and paste paper 10  into selection
Select none,Apply mask
Then Merge group.


go to layers and add a new raster layer and floodfill with write
and drag underneath the mask layer


copy and paste BFly1 as new layer


copy and paste a tube of your choice and resize if required


copy and paste Bling3 as new layer,resize to 50%


copy and paste Bling1 as new layer,resize to 60%


copy and paste Cloud1 as new layer,resize to 80%


copy and paste Sun as new layer,resize to 80%


copy and paste Lollipop1 as new layer,resize to 70%


copy and paste Kitty  as new layer,resize to 60%


copy and paste Flower3 as new layer,resize to 70%


copy and paste Drink as new layer,resize to 70%


copy and paste DFly1 as new layer,resize to 50%


copy and paste Cupcake1 as new layer,resize to 60%


Add © info and name,Merge visible
And Resize as needed.

Thanks for trying my tutorial hope you enjoyed it :)

Tuesday 27 September 2011

Nerds Rock


I Wrote This Tut On 14TH  Of  September  ,2011 For Julies Tutorials
Any Resemblance To Any Other Tutorials Is Purely Coincidental.
Supplies needed
You also need paint shop pro,I use version 12,but any version is ok
A knowledge of paint shop pro is needed
Other supplies needed
Scrap kit  used is I Luv Nerds by Angel designz
http://angelsdesignz.blogspot.com  
tube of your choice
mask 3 used is by weescotslass creations
http://weescotslasscreations.blogspot.com/
Font of your choice,i used a P.T.U font called MrsBeasleyEF 
Lets begin
Open a new 700x700 transparent image
Select all,Copy and paste paper 9  into selection
Select none,Apply mask
Then Merge group.

go to layers and add a new raster layer and floodfill with write
and drag underneath the mask layer
copy and paste Frame4 as new layer and
With the magic wand click inside frame.
Expand selection by 5

Add new raster layer under frame.
Copy and paste paper 1  into selection.
Select none.

copy and paste HeartBeadString as new layer

copy and paste a tube of your choice and resize if required
i used NerdyBoy which comes with the kit

copy and paste Bow1 as new layer,resize to 50%

copy and paste Star1 as new layer,resize to 50%


copy and paste StarScatter as new layer,go to image>duplicate
>mirror then flip

copy and paste T-Shirt as new layer,resize to 70%

copy and paste String as new layer and position
to the left underneath the star layer

copy and paste  Sparkles as new layer

copy and paste Star2 as new layer,resize to 50%

copy and paste Shoe as new layer,resize to 70%

copy and paste Beads as new layer

copy and paste Skull2 as new layer,resize to 40%

add more elements if you wish its your tag after all

Add © info and name,Merge visible
And Resize as needed.

Thanks for trying my tutorial hope you enjoyed it :)

I Heart You


I wrote this tut on 14th  of September ,2011 for julies tutorials
Any resemblance to any other tutorials is purely coincidental.
Supplies needed
You also need paint shop pro,I use version 12
A knowledge of paint shop pro is needed
Other supplies needed
Scrap kit  I Heart Elias   by  Angel designz
You can buy this kit from Here
template   by Dee http://deessigndepot.blogspot.com/search/label/Templates
Tube of choice I'm using elias chatzoudis http://www.elias-design.gr/
,I brought this from MYPSPTUBES he no longer sells There
Do not use unless you have a proper license to do so
You can buy his work @ http://psptubesemporium.com/elias-chatzoudis/
mask 363 used is by weescotslass creations
Font of your choice,i used ptu MrRafkin 
Lets begin

Open template,delete copyright info
activate each layer,using your magic wand click inside each part
and either choose a color or use a paper from the kit your using 

Select all,Copy and paste paper 1  into selection
Select none,Apply mask
Then Merge group.

go to layers and add a new raster layer and floodfill with write
and drag underneath the mask layer 

once you have completed each layer to your liking at some elements from the kit

Copy and paste any elements of your choice or use the ones that i did
And please see my tag for placement of elements
I used these's elements and resizes as follows:
Bow2 resize to 40%
FireCharm1  resize to 40%
FireCharm2  resize to 40%
Flower resize to 30%
FuzzyHeart  resize to 40%
Glitter
Hearts resize to 60%
Lips resize to 30%
Ribbon
Sequins
Silhouette resize to 40%
Wordart2


Copy and paste a tube of your choice
And resize if needed,i resized mine to 400 pixels

Choose 2 colors to write out your name with a font
Of your choice.

Add any copyrights and watermarks,Merge all layers visible

resize your tag if needed,I always Resize mine to 500 pixels

Go to file>export and save as JPEG or png

Thanks for trying out my tut ,hope you enjoyed it,if you have
Any questions or comments please leave me a comment  :)
 

Wednesday 14 September 2011

Back 2 School

I wrote this tut on 14th  of September ,2011 for julies tutorials
Any resemblance to any other tutorials is purely coincidental.

Supplies needed

You also need paint shop pro,I use version 12
A knowledge of paint shop pro is needed

Other supplies needed

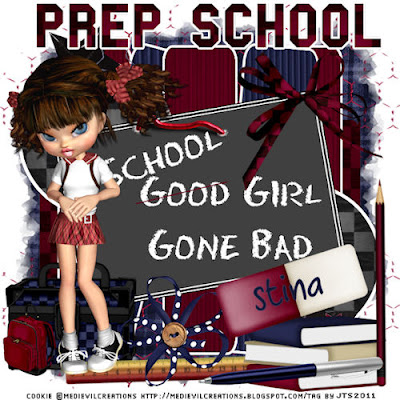
Scrap kit  Prep School  by  by designed by stina
You can buy this kit from Here
template   by Dee
Tube of your choice, i used the cookie which comes with the kit and is by medievilcreations
mask 363 used is by weescotslass creations
Font of your choice ,i used crossword bella

Lets begin


Open template,delete copyright info

delete all of the words back to detention and school

activate each layer,using your magic wand click inside each part
and either choose a color or use a paper from the kit your using 


Select all,Copy and paste paper 6  into selection
Select none,to Apply a mask go to layers>load/save mask>load mask from disc
apply the mask Then Merge group.


go to layers and add a new raster layer and floodfill with write
and drag underneath the mask layer


once you have completed each layer to your liking


Copy and paste any elements of your choice or use the ones that i did
And please see my tag for placement of elements

I used these's elements and sizes as follows:

Wire03
WordArt02 resize to 80%
Staple03  resize to 70%
ChalkyWords02 resize to 50%
Ruler01 resize to 60%
Pencil02 resize to 60%
Pen01 resize to 50%
Lunchbox resize to 30%
Flower01 resize to 40%
Eraser resize to 40%
Books resize to 40%
Backpack01 resize to 20%
Bow04 resize to 50%


Copy and paste a tube of your choice or use one of the cookies
that come with the kit And resize if needed,i resized mine to 400 pixels


Choose 2 colors to write out your name with a font
Of your choice.


Add any copyrights and watermarks,Merge all layers visible


resize your tag if needed,I always Resize mine to 500 pixels


Go to file>export and save as JPEG or png


Thanks for trying out my tut ,hope you enjoyed it,if you have
Any questions or comments please leave me a comment  :)
 

Monday 12 September 2011

I Love Edward Cullen


I wrote this tut on 12TH  of September ,2011 for julies tutorials
Any resemblance to any other tutorials is purely coincidental.

Supplies needed

You also need paint shop pro,I use version 12
A knowledge of paint shop pro is needed

Other supplies needed

Scrap kit  Break Me  by  Pimpd Designz 
You can buy this kit from Here
Edward template  by pimpd designz
Tube of choice I'm using Zlata_M © Exclusive ,Do not use unless you have a proper license to do so
You can buy this work @ www.PicsForDesign.com

Font of your choice

Lets begin


Open template,delete copyright info

activate each layer,using your magic wand click inside each part
and either choose a color or use a paper from the kit your using


copy and paste paper or color into selection


once you have completed each layer to your liking at some elements from the kit


Copy and paste any elements of your choice or use the ones that i did
And please see my tag for placement of elements

I used these's elements as follows:

wa-02 resize to 80%

swirl-02 resize to 70%

swirl-01 resize to 70%

ribbon-01 resize to 70%

print-01

ring resize to 70%

moon-01 resize to 60%

leaf-02

hearts-01 resize to 70%

flower-02 resize to 60%

charm  resize to 50%

feather  resize to 50%


Copy and paste a tube of your choice
 And resize if needed,i resized mine to 400 pixels


Choose 2 colors to write out your name with a font
Of your choice.


Add any copyrights and watermarks,Merge all layers visible


resize your tag if needed,I always Resize mine to 500 pixels


Go to file>export and save as JPEG or png


Thanks for trying out my tut ,hope you enjoyed it,if you have
Any questions or comments please leave me a comment  :)

Spoiled Brat

I wrote this tut on 12th  of September ,2011 for julies tutorials
Any resemblance to any other tutorials is purely coincidental.

Supplies needed

You also need paint shop pro,I use version 12
A knowledge of paint shop pro is needed

Other supplies needed

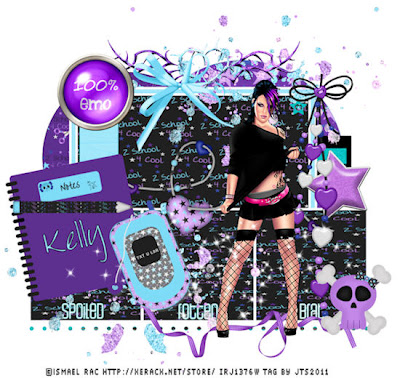
Scrap kit  2 school 4 cool  by Angels designz
You can buy this kit from Here
template   by cakes crazycakesscraps
Tube of choice I'm using Ismael Rac,Do not use unless you have a proper license to do so
You can buy his work @ http://store.xeracx.net/
Font of your choice

Lets begin


Open template,delete copyright info

activate each layer,using your magic wand click inside each part
and either choose a color or use a paper from the kit your using


copy and paste paper or color into selection


once you have completed each layer to your liking at some elements from the kit


Copy and paste any elements of your choice or use the ones that i did
And please see my tag for placement of elements

I used these's elements as follows:

 BeadString2
Bow3 resize to 70%
BeadString1
Brad resize to 60%
GlitterSplatter
Cellphone resize to 70%
Notebook  resize to 60%
Pencil  resize to 70%
Ribbon
Skull2 resize to 50%
Sparkles
Star1 resize to 60%
Tattoo


Copy and paste a tube of your choice or use one of the cookies
that come with the kit And resize if needed,i resized mine to 400 pixels


Choose 2 colors to write out your name with a font
Of your choice.


Add any copyrights and watermarks,Merge all layers visible


resize your tag if needed,I always Resize mine to 500 pixels


Go to file>export and save as JPEG or png


Thanks for trying out my tut ,hope you enjoyed it,if you have
Any questions or comments please leave me a comment  :)
 

Emo's Rock

I wrote this tut on 12th  of September ,2011 for julies tutorials
Any resemblance to any other tutorials is purely coincidental.

Supplies needed

You also need paint shop pro,I use version 12
A knowledge of paint shop pro is needed

Other supplies needed

Scrap kit  Emo  by  diane of candytreat's
You can buy this kit from Here
template emolicious  by sarah at sarah's Tags-N-Thing
Tube of choice I'm using Ismael Rac,Do not use unless you have a proper license to do so
You can buy his work at his store
Font of your choice

Lets begin


Open template,delete copyright info

activate each layer,using your magic wand click inside each part
and either choose a color or use a paper from the kit your using


copy and paste paper or color into selection


once you have completed each layer to your liking add some elements from the kit


Copy and paste any elements of your choice or use the ones that i did
And please see my tag for placement of elements

I used these's elements as follows:

bg duplicate this layer place one top left and one bottom right
Balloon2  and balloon3 resize to 80%
bowSmall
Cupcake5 resize to 60%
Drips
Ele5
EleScatter
glittersplatblack
glittersplatRed
overlayCluster2
WA-xoxo


Copy and paste a tube of your choice
 And resize if needed,i resized mine to 400 pixels


Choose 2 colors to write out your name with a font
Of your choice.


Add any copyrights and watermarks,Merge all layers visible


resize your tag if needed,I always Resize mine to 500 pixels


Go to file>export and save as JPEG or png


Thanks for trying out my tut ,hope you enjoyed it,if you have
Any questions or comments please leave me a comment  :)
 

Sunday 11 September 2011

We Shall Never Forget 9/11

 
This is dedicated to all those who lost their lives on that tragic day
10 years ago today,god bless you all
11/09/01 and 10 years on 11/09/11 we shall never forget


I Wrote This Tut On 11th  Of  September ,2011 For Julies Tutorials
Any Resemblance To Any Other Tutorials Is Purely Coincidental.


Supplies needed

You also need paint shop pro,I use version 12,but any version is ok
A knowledge of paint shop pro is needed

Other supplies needed

FTU scrapkit  American by http://artmamasstudio.blogspot.com/
tube used is by  Robin Mcquay
you need a license to use this work purchase from HERE
mask 228 used is by weescotslass creations
Font of your choice 

Lets begin
Open a new 700x700 transparent image
Select all,Copy and paste paper  10 into selection
Select none,Apply mask
Then Merge group.


go to layers and add a new raster layer and floodfill with write
and drag underneath the mask layer

copy and paste embellie15 as new layer and
With the magic wand click inside frame.
Expand selection by 5


Add new raster layer under frame.
Copy and paste paper 9  into selection.
Select none.


copy and paste the following  as new layers and resize if required

embellie01  

embellie06

embellie10

embellie49

embellie50

 embellie17

embellie45

embellie25

embellie40

 embellie31


copy and paste a tube of your choice and resize if required


add any other elements that you wish too


Add © info and name,Merge visible
And Resize as needed.

Thanks for trying my tutorial hope you enjoyed it :)